
New here? Start with my weekend DIY project roundup.
The first cold morning of October, I stood in front of my bare fireplace holding a $20 bill and a cup of coffee, and I decided that was my whole budget. No Target run that turned into $90. Just twenty bucks. That little dare is exactly how my favorite DIY fall mantel decor setup got made, and three autumns later I still pull most of it out of the same bin.
If you’ve ever scrolled past those glossy mantel photos and thought “okay but who has a spare $300 for fake pumpkins,” same. I’m going to walk you through the exact $20 mantel I built, where every dollar went, and the little tricks that make a cheap mantel look like you tried way harder than you did.
Why I cap my fall mantel at $20 (and you can too)
Here’s the thing nobody on Pinterest tells you. A mantel is a small space. You physically cannot fit $300 of decor on a ledge that’s maybe five feet wide without it looking like a craft store exploded. The budget cap isn’t a sacrifice. It’s the secret.
When I only have $20, I’m forced to pick a few good pieces and lean on stuff I already own. That restraint is what makes it look intentional instead of cluttered. My first fall here I spent close to $70 and it looked worse, honestly. Too many tiny gourds, too many competing colors. Less really is the move.
The other reason I love a tight budget is that fall decor gets used for maybe eight weeks, then it lives in a tote in the basement. Twenty dollars a year for two months of cozy is a deal I’ll take every single time.
My exact $20 fall mantel shopping list
I do this run at the dollar store plus one quick stop for stems. Here’s everything I bought, with real prices from last fall. Your store may run a dollar off here or there, but this is genuinely what it cost me.
| Item | Where | Cost |
|---|---|---|
| 3 faux mini pumpkins (white + orange) | Dollar store | $3.75 |
| 2 stems of faux fall leaves | Dollar store | $2.50 |
| 1 bag of pinecones | Dollar store | $1.25 |
| 3 taper candles (cream) | Dollar store | $3.00 |
| 1 small wood crate / riser | Dollar store | $1.25 |
| 1 roll burlap ribbon | Dollar store | $1.25 |
| 1 mini string of warm LED lights | Dollar store | $1.25 |
| 1 eucalyptus or fall stem bunch | Craft store sale bin | $3.99 |
| Total | $18.24 |
That left me $1.76, which I rounded up to a coffee on the way home. The candle holders, the books I stacked, and the little vase were all things I already had. I’ll show you how I used the “free” stuff in a second, because that’s where a $20 mantel actually wins.
The “shop your house first” step everyone skips
Before I spent a dime, I walked around with an empty laundry basket and grabbed anything fall-adjacent I already owned. Two old hardcover books with warm spines. A small ceramic vase. A wood cutting board I never use. A cozy throw I draped over one corner of the mantel.
That basket is the difference between a $20 mantel and a $60 one. You are not starting from zero. You’re styling. Big difference, and it costs nothing.
How I actually arranged my DIY fall mantel decor
Buying the stuff is easy. Making it look good is where people freeze up. I use a dead-simple formula I stole from watching way too many decor videos, and it works on any mantel, any budget.
- Anchor the middle. I put the tallest thing dead center or slightly off-center. Mine was a small framed print I already owned, leaned against the wall.
- Build height with risers. That $1.25 wood crate and my stack of books let me set candles and pumpkins at different levels. Flat mantels look boring. Varied height looks designed.
- Work in odd numbers. Three pumpkins, three candles. Groups of three or five just read as more natural to the eye.
- Trail the greenery. I draped the eucalyptus and leaf stems so they spilled over the front edge a little. That soft drape hides the candle bases and makes the whole thing feel lush.
- Tuck the lights last. I wove the warm LED string through the greenery and pinecones. At night it’s genuinely magic for $1.25.
I stand back, take a phone photo, and look at it on my screen. The camera shows you the gaps and the lopsided bits your eyes glaze over in person. I move maybe two things, then I’m done. Whole project, start to finish, took me about 25 minutes.
Real talk on the before and after
Before, my mantel was a sad ledge with a clock and a stray remote on it. After, it’s the first thing my kids’ friends comment on when they come over in October. Nobody has ever asked what it cost. They just say it looks cozy. That’s the whole goal, and it’s a $20 goal.
A quick word on candles and fire safety
Since a mantel sits right above a fireplace, I have to say the boring grown-up thing. Be smart about open flames near decor. Dried leaves, ribbon, and faux stems are flammable, and a mantel is exactly the spot where a forgotten candle meets a draft.
I switched almost entirely to flameless LED candles for this reason, and they look shockingly good now. If you do use real tapers, keep them away from greenery and never burn them when you leave the room. For the full rundown, the CPSC on holiday decorating safety has clear, no-nonsense guidance worth a two-minute read before you light anything.
Grab my free Fall Mantel Styling Cheat Sheet
I made a one-page printable with the $20 shopping list, the height-and-odd-numbers formula, and a little checklist so you don’t forget the lights (I always forget the lights). It’s free, no strings. Print it, take it to the dollar store, and build your mantel in one trip.
Make it yours: easy swaps by style and season
The formula stays the same all year. I just swap the seasonal bits. Here’s how I stretch one $20 base into multiple looks without rebuying everything.
- Neutral / modern fall: skip the orange, go all white pumpkins, cream candles, and dried wheat. Looks expensive, costs the same.
- Cottage fall: add gingham or plaid ribbon and a tiny thrifted basket. Warm and homey.
- Roll it into winter: pull the pumpkins, keep the greenery and lights, and you’re halfway to a holiday mantel already. I break that whole transition down in my cozy winter home ideas post.
And if the dollar-store approach is clicking for you, you’ll love what I did with the same store for the holidays in my dollar-store Christmas centerpiece guide. Same energy, same tiny budget, full table this time.
DIY fall mantel decor: what to splurge on vs. what to save on
A fall mantel does not need a big budget, but a few pieces are worth a little extra while others you should absolutely grab cheap. Here is where I would spend and where I would save, with rough 2026 estimates so you can balance the whole display.
| Item | Splurge | Save | My take |
|---|---|---|---|
| Garland / greenery | $25–$45 weighted faux | $5–$12 thin stems | Splurge — it is the backbone and lasts years |
| Candles | $15–$30 scented set | $3–$8 LED pillars | Save — LEDs look the same unlit |
| Pumpkins | $12–$20 velvet/ceramic | $1.25–$5 craft-store foam | Mix both for depth |
| Vases / vessels | $18–$35 ceramic | $0 thrifted or owned | Save — thrift or shop your house |
| Signage / art | $20+ framed print | $0 free printable | Save — print at home |
Common fall mantel mistakes to avoid
- Lining everything up in one flat row — vary the height with stacked books or risers so it reads styled, not like a shelf of objects.
- Overloading with too many tiny pieces — five little pumpkins and ten gourds turn into visual noise. Edit down and let a few anchor pieces breathe.
- Forgetting to protect the mantel surface — taper holders and resin pumpkins can scratch wood or stone. Slip felt pads or a runner underneath before you style.
FAQ
Can you really make fall mantel decor for $20?
Yes, genuinely. My exact build came to $18.24 using dollar-store basics plus one discounted stem bunch. The trick is shopping your own house first for books, vases, and a throw, then spending your cash only on the seasonal pieces like pumpkins, candles, and greenery.
What goes in the middle of a fall mantel?
Anchor the center with your tallest item, like a framed print, a clock, or a leaned mirror you already own. Then build down and out from there with candles, pumpkins, and trailing greenery at varied heights. The center anchor keeps the whole arrangement from looking flat or random.
Is it safe to put decor on a mantel above a fireplace?
It can be, as long as you treat anything flammable with respect. Faux stems, ribbon, and dried leaves catch easily, so I use flameless LED candles and keep decor back from any active flame. If you light real tapers, never leave them burning unattended.
Here’s what I want you to take from all this: a beautiful fall mantel was never about money. It’s about a few good pieces, a little height, and the stuff you already own. Grab your twenty bucks and an empty basket, give yourself 25 minutes, and go make your house feel like fall. You’ve got this, and your wallet will barely notice.
Free DIY Project Cost Estimator
The spreadsheet I use to price out a project before I start, so a weekend job never blows the budget. Join the newsletter and I’ll send it over.
No spam, ever. Unsubscribe anytime. — Tessa
Keep reading — more on Holiday & Seasonal DIY

Last-Minute 4th of July Decor on a Budget (Easy DIY Ideas)
Last-minute 4th of July decor on a budget: a three-zone plan, dollar-store buys, and real costs…
Read article →
Prime Day Tool Deals 2026: Worth It vs. Skip (A Handywoman's Honest List)
Are Prime Day tool deals worth it in 2026? A handywoman's honest worth-it-vs-skip list, the 90-second…
Read article →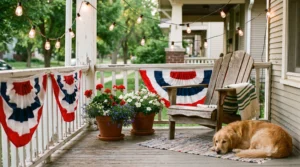
Easy DIY Patriotic Porch Decor Under $30 (No-Sew, Renter-Friendly)
New here? Start with my weekend DIY project roundup. It was the last week of June…
Read article →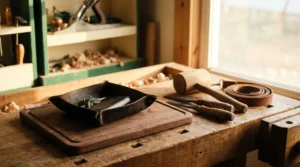
12 DIY Father's Day Gifts a Handy Dad Will Actually Use (Under $25)
12 DIY Father's Day gifts a handy dad will actually use, each under $25 and doable…
Read article →