I stood in the middle of my living room with a cold cup of coffee and a feeling I think a lot of us know. The room wasn’t ugly, exactly. It was just sad. Beige walls I couldn’t paint, a sofa from my first apartment, and that flat overhead light that makes everyone look tired. A designer would have quoted me four grand to fix it. I had $200 and a stubborn streak. This is the full budget living room makeover I pulled off for less than the cost of one decent armchair, every receipt included, nothing hidden.
I’m not going to pretend I turned it into a magazine cover. What I did was make a room I actually wanted to sit in, and I did it without a contractor, without painting, and without blowing past two hundred dollars. If you’re renting or just broke (been both), this one’s for you.
The before: what I was working with
Let me set the scene honestly, because the internet only shows you the after. My living room had landlord beige walls, scuffed laminate floors, a navy sofa with a permanent dent on one cushion, mismatched side tables, and a coffee table I’d had since college that wobbled. The window had those plastic mini-blinds every rental seems to ship with, and not a single thing on the walls.
The problem wasn’t any one piece. It was that nothing talked to each other and the whole room felt like a waiting area. My goal for this budget living room makeover was simple: warmth, cohesion, and a reason to put my phone down and stay in there.
My rules before I spent a dollar
I gave myself three rules, and they’re the reason I stayed under budget instead of “accidentally” hitting $500.
One: no big furniture. The fastest way to blow a budget living room makeover is buying a new couch. I worked with what I had and changed everything around it.
Two: thrift and DIY first, buy new only when I had to. Roughly two-thirds of this room came secondhand or got made by hand.
Three: warmth over trend. I wasn’t chasing a specific aesthetic. I was chasing a feeling. Warm light, soft texture, a little green. That kept me from impulse-buying junk that wouldn’t last.
One quick safety aside, since this makeover involved a leaning mirror and a few wall hangings. If you have kids or pets, anchor tall pieces and respect weight limits on adhesive hooks. The U.S. Consumer Product Safety Commission has solid, free guidance on furniture tip-over safety, and it’s a two-minute read that’s genuinely worth it before you lean a big mirror against a wall.
The budget living room makeover cost breakdown
Here’s the part you actually came for. This is every single thing I bought, what it cost, and where it came from. No rounding to make it look better. The total is real.
| Item | Where | Cost |
|---|---|---|
| Warm dimmable smart bulbs (3-pack) | Hardware store | $22 |
| Thrifted floor lamp | Goodwill | $12 |
| Floor-length curtains + tension rod | Online sale | $34 |
| 8×10 area rug (holiday sale) | Big-box store | $48 |
| Stretch slipcover for the sofa | Online | $31 |
| Throw pillow covers (4) + one insert | Discount store | $18 |
| Two thrifted framed prints | Thrift store | $9 |
| Leaning floor mirror (secondhand) | Marketplace | $15 |
| Real pothos + 2 faux stems | Garden center | $11 |
| Paint + supplies for coffee table flip | Had most, bought sandpaper + 1 sample pot | $8 |
| Total | $208… see below |
Okay, full honesty: my first tally hit $208, eight dollars over. So I returned the pillow insert (I had one that worked from the bedroom) and dropped to four covers on pillows I already owned. That knocked off $9 and landed me at $199. I’m telling you that because the “under $200” makeovers online almost never show you the part where they had to put something back. I did.
What I changed, room zone by room zone
Lighting first, always
I cannot overstate this. The single biggest shift in the whole makeover came from $22 of warm dimmable bulbs and a $12 thrifted floor lamp. I killed the overhead light almost entirely and lit the room with two warm sources instead. At night the room went from “dentist office” to “wine and a movie.” If you do nothing else from this budget living room makeover, do this.
The sofa got a second life
That dented navy couch got a gray stretch slipcover for $31. It hid the dent, hid a coffee stain I’d given up on, and reset the whole color story of the room. Slipcovers take some wrestling to tuck in tight, so do it on a day you’re feeling patient. Worth every minute.
Curtains hung high and wide
I hung floor-length curtains on a tension rod, mounted close to the ceiling and wider than the window so the panels framed the glass instead of choking it. This $34 trick made the ceiling look higher and finally hid those plastic mini-blinds. It’s the move that makes people think you spent way more than you did.
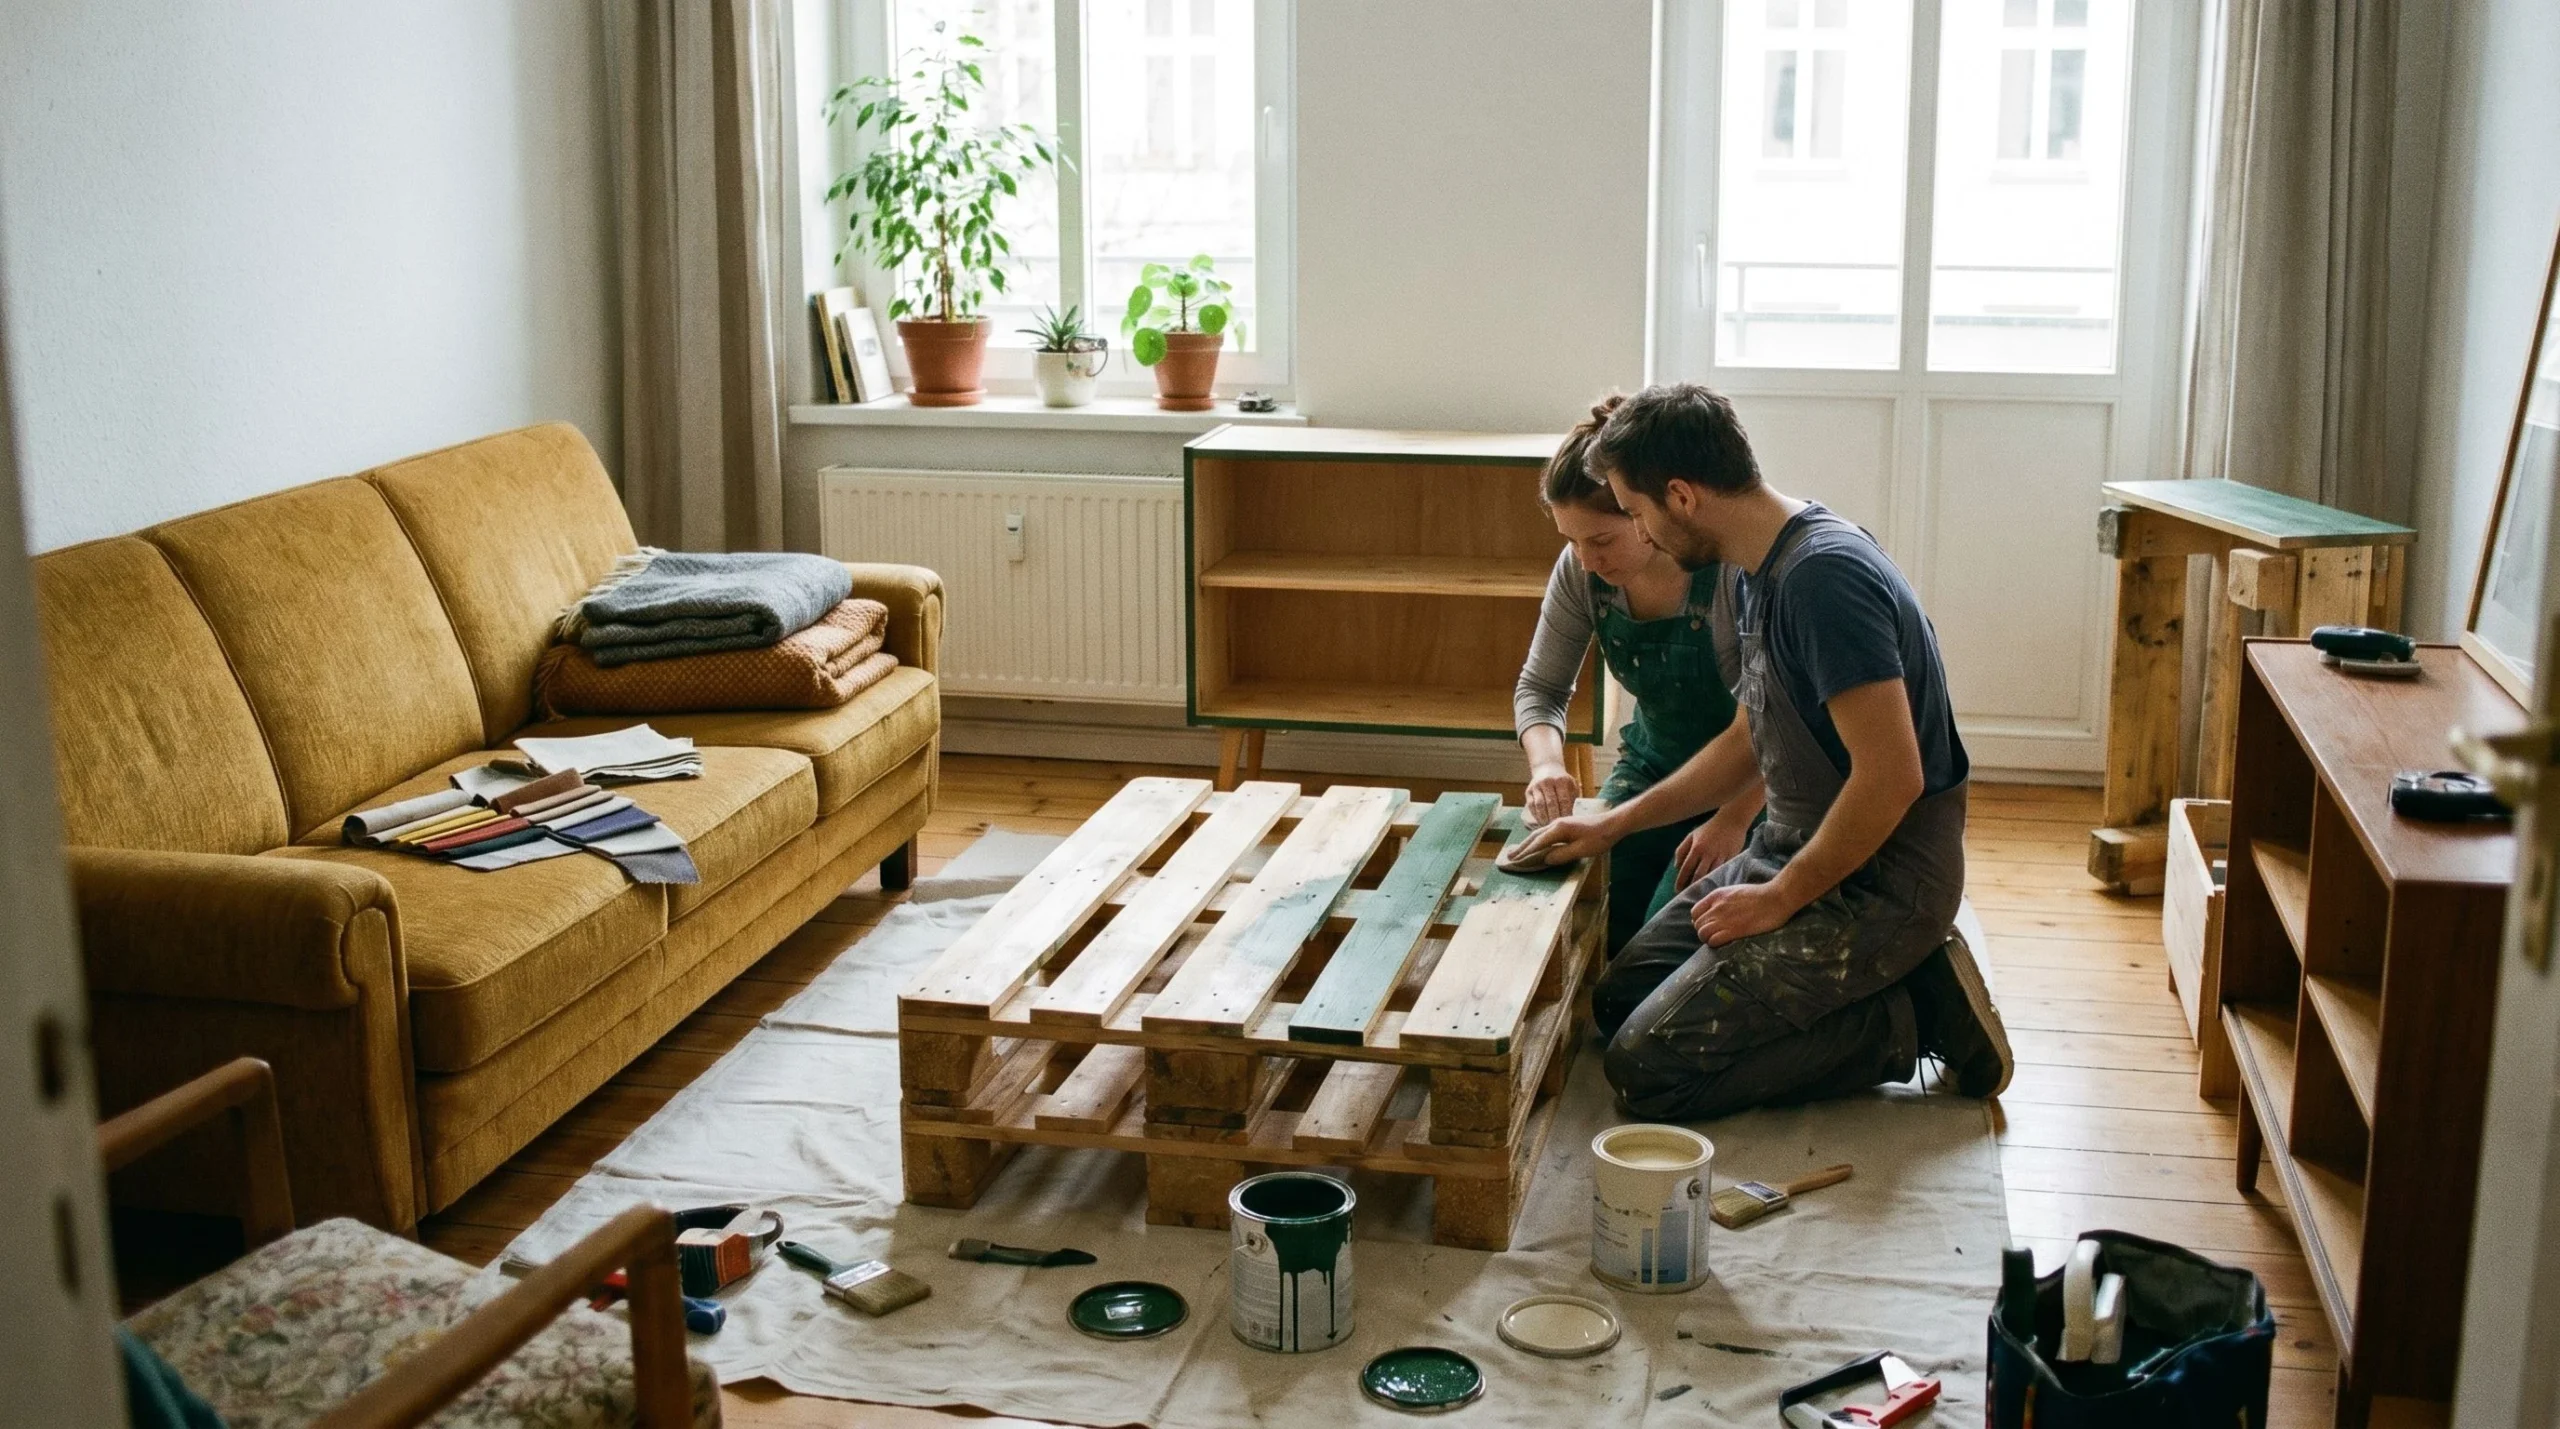
The coffee table flip
My wobbly old coffee table got tightened, lightly sanded, and painted in a warm muted green sample pot I had mostly left over. Total new spend: $8 for sandpaper and one small pot. It went from “college dorm” to “actually kind of cool” and became a little anchor for the room.
Walls and warmth
Two thrifted prints for $9, hung with adhesive strips so I keep my deposit. A $15 secondhand floor mirror leaned in the corner to bounce light and fake some square footage. A real pothos plant and a couple of faux stems for $11 added the green that makes a room feel alive. That’s the finishing layer, and it’s the cheapest part.
What I chose not to do (and why)
I want to be straight with you about the limits of a budget living room makeover, because pretending there are none is how people end up disappointed.
I didn’t touch the floors. Refinishing or replacing laminate is real money and real labor, and as a renter it wasn’t mine to change anyway. The rug covers the worst of it and that’s enough. I didn’t replace the sofa, obviously. And I didn’t repaint the walls, partly because of my lease and partly because warm lighting and curtains did so much that the beige stopped bothering me.
If you own your place and you’re itching to paint, that’s a fair upgrade for around $50 in supplies. But I want you to see that I got a genuinely transformed room without it. Sometimes the cheaper path is also the smarter one.
Where I found the deals (and how to wait for them)
A budget living room makeover lives or dies on timing. The exact same rug that ran me $48 on a holiday weekend was $89 full price three weeks earlier. If you can be patient, you save real money. Here’s where I actually shopped and what I watched for.
Thrift stores and marketplace
The floor lamp, the mirror, and the framed prints all came secondhand, and together they cost $36 instead of the $90-plus they’d run new. I check my local thrift store every couple of weeks and save searches on resale marketplaces for “floor lamp” and “mirror” so deals come to me. Patience here is the single biggest budget lever you have.
Big-box sales and coupons
The rug, curtains, and slipcover came from regular stores, but never at full price. Rugs and textiles go on sale around long holiday weekends like Memorial Day, Labor Day, and the post-Christmas clearance. I waited for a sale on the rug and stacked a first-order coupon on the slipcover. Set a price in your head and don’t move until it hits.
What I bought new without flinching
Two things were worth buying new and full-ish price: the warm bulbs and the floral pothos. Lighting is the heart of this whole makeover, and a healthy plant lasts years. Everything else, I waited out or thrifted. Knowing which few things to splurge a little on keeps the rest of the budget honest.
Free Budget Makeover Tracker (printable)
This is the exact one-page spreadsheet-on-paper I used to keep this makeover under $200. Columns for item, source, planned cost, actual cost, and a running total so you catch yourself before you overspend, not after. Print it and fill it in as you shop.
Stretch it further if you have even less
If $200 is still more than you’ve got right now, you can absolutely do a version of this for under $75. Skip the rug and slipcover, hit the lighting and curtains, and lean hard on thrift and DIY. The warmth comes from light and texture, and both of those are cheap. For the smallest finishing touches, my dollar-store DIY decor guide has a pile of ideas under five bucks each that don’t look like dollar-store anything. And if you rent and you’re nervous about holes and damage, start with my renter-friendly decor ideas so every change here reverses clean on move-out day.
If you like keeping projects cheap, you’ll want the real numbers on home improvement spending.
How to split a $200 living room makeover budget
Two hundred dollars goes further than you would think if you spend it on the pieces that change how the whole room feels. Here is a sample allocation that prioritizes impact over filler, using realistic 2026 estimates.
| Category | What it does | Est. 2026 spend |
|---|---|---|
| Throw pillows & covers | Fast color refresh, hides tired sofa | $30 – $50 |
| Area rug (small/runner) | Anchors the seating, warms the floor | $40 – $70 |
| Wall art / frames | Fills blank walls, adds personality | $20 – $40 |
| Plants (real or faux) | Softens corners, adds life | $15 – $30 |
| Lighting (lamp or smart bulbs) | Swaps harsh overhead for cozy glow | $20 – $40 |
Common budget makeover mistakes to avoid
- Spreading $200 across ten tiny tchotchkes — a pile of small accessories reads cluttered, not refreshed. Put the money behind two or three pieces that actually shift the room.
- Buying a rug that is too small — a postage-stamp rug floating in the middle makes everything look cheaper. Size up even if it means a flatweave instead of plush.
- Ignoring the lighting — the cheapest, highest-impact change is swapping cold overhead light for a warm lamp. People skip it and wonder why the room still feels off.
FAQ
Can you really do a budget living room makeover for under $200?
Yes, but only if you skip new furniture and lean on lighting, textiles, thrift, and DIY. I did mine for $199 by reusing my existing sofa and tables and changing everything around them. The number gets unrealistic fast the second you add a new couch or refinish floors, so set the rule “no big furniture” up front and you’ll make it.
What gives the biggest visual change for the least money?
Warm, dimmable lighting and floor-length curtains hung high and wide. Together they cost me about $56 and they did more for the room than anything else. Lighting changes the entire mood at night, and tall curtains make the whole room read bigger and more finished. Start there before you spend on decorative extras.
I rent. Will any of this lose me my deposit?
Not if you stick to reversible changes. Everything in this makeover came off clean: adhesive strips for art, a tension rod for curtains, a leaning mirror instead of a hung one, and the original bulbs saved in a drawer. Keep one “move-out” box of original parts and you reverse the whole thing in an afternoon.
Your living room doesn’t need a contractor and it doesn’t need four grand. It needs warm light, a little texture, and you deciding it’s worth an afternoon. Start with the lighting this weekend and see how the room feels by Saturday night. I think you’ll surprise yourself. I sure did.
Free DIY Project Cost Estimator
The spreadsheet I use to price out a project before I start, so a weekend job never blows the budget. Join the newsletter and I’ll send it over.
No spam, ever. Unsubscribe anytime. — Tessa
Keep reading — more on Budget Decor
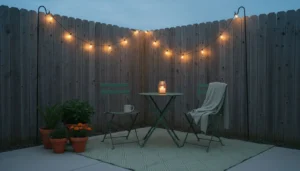
Budget Backyard Makeover: How I Did Mine for Under $200 (Renter-Friendly)
My budget backyard makeover cost $186, not $5,000. Here's the renter-friendly weekend playbook for cozy outdoor…
Read article →
DIY Back-to-School Drop Zone: A Backpack & Homework Command Station
Build a DIY back-to-school drop zone in a weekend: hooks, cubbies, and a homework command station…
Read article →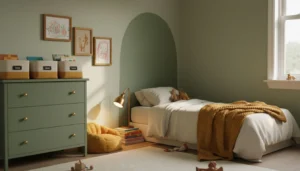
Kids' Room Makeover on a Budget (A Back-to-School Refresh)
Three weeks before school started, my daughter announced that her room was “a baby room” and…
Read article →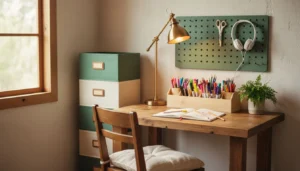
Back-to-School Homework Station: A DIY Study Nook on a Budget
The DIY homework station I built for about $79: where to put it, what to buy,…
Read article →