
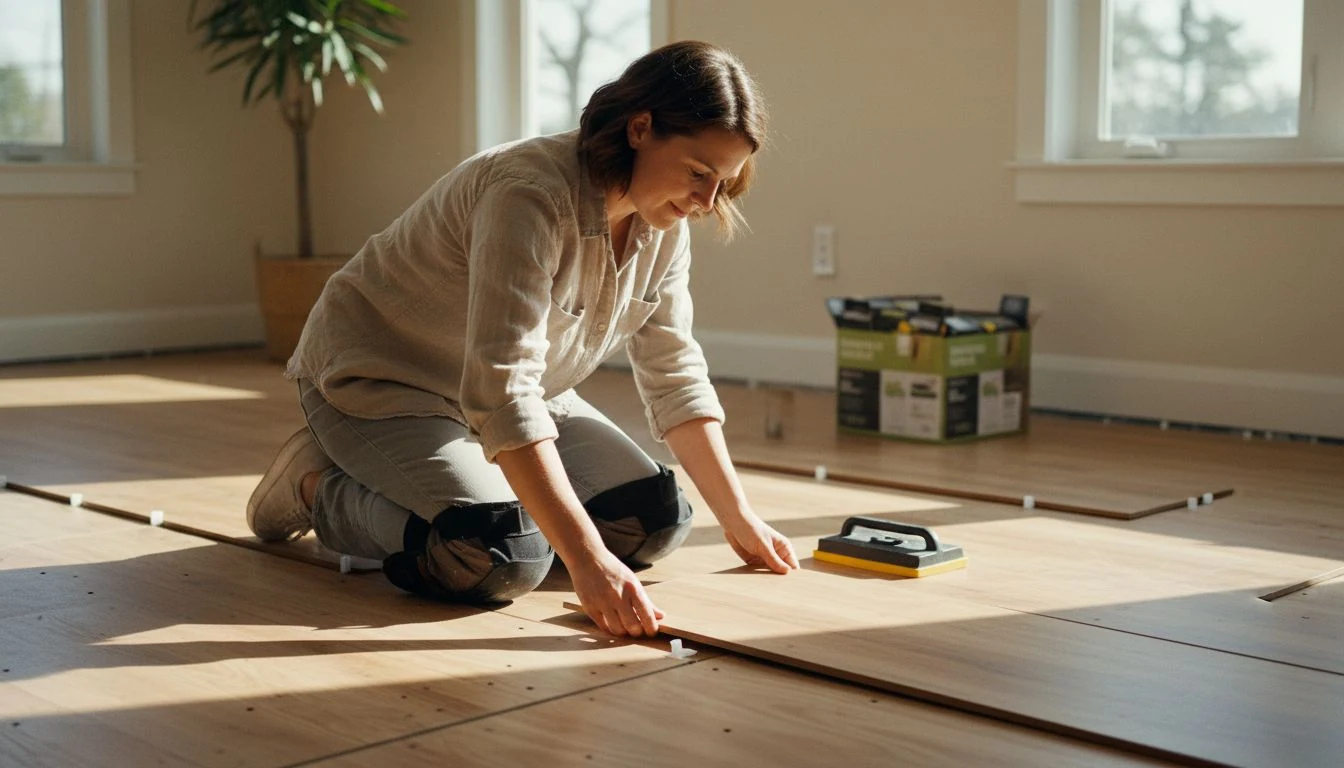
The first plank I ever laid, I put down backwards. Tongue where the groove should go, wrong wall, the whole bit. I pulled it up, laughed at myself, and by the end of that Saturday my kitchen had a brand-new floor that a crew had wanted $1,150 to install. So when people ask me how to install vinyl plank flooring like it’s some locked-away contractor secret, I get a little fired up. It isn’t. Click-lock vinyl was built for regular people with a utility knife and a free weekend.
Here’s what you’ll walk away with: exactly how to install vinyl plank flooring in a normal room, start to finish, plus what to buy, how long it really takes, and the two or three mistakes that make people rip the whole thing up and start over. I’ve done four rooms in my own house now. I’ll tell you where I got it right and where I didn’t.
What you need before you start
Good news first. This is one of the cheapest project kits in home improvement, because you don’t need a wet saw, a nail gun, or a truck full of tools. Most of this fits in a shopping cart. Here’s my actual list, with what I paid in 2026.
| Item | What it’s for | 2026 cost |
|---|---|---|
| SPC rigid-core planks | The floor itself (buy 10% extra for cuts) | $2 to $5 / sq ft |
| Utility knife + spare blades | Scoring and snapping planks | $12 to $20 |
| Tapping block + pull bar | Snugging seams without wrecking edges | $15 to $30 (kit) |
| Spacers | Holding the expansion gap at the walls | $8 to $12 |
| Rubber mallet | Gentle persuasion on tight joints | $10 |
| Tape measure + speed square + pencil | Measuring and marking cuts | $20 if you own nothing |
| Jigsaw (borrow one) | Curved cuts around pipes and door frames | $0 to $45 |
That’s it. A whole install-kit tap-block set runs under $30 at any big-box store, and the tapping block is the one tool I’d never skip. My first room, I “saved” the $25 and hammered planks directly with a scrap of wood. Chewed up three edges. Buy the block. If you’re still deciding between vinyl and something pricier, my vinyl plank flooring installation cost guide lays out the money side, and the tile installation cost guide covers the harder, more expensive cousin.
How to install vinyl plank flooring, step by step
Here’s the whole process, in the order I actually do it. Read it through once before you open a single box. The two steps everyone rushes, one and two, are the ones that decide whether your floor is still flat and quiet next summer.
- Check and clean the subfloor. Run a level or a long straight board across the floor. Anything more than about 3/16 inch of dip over 10 feet gets fixed with leveling compound before you go further. Sweep and vacuum every crumb. A single stray screw or pebble under a plank telegraphs right through as a lump you’ll feel with your feet.
- Let the planks sit in the room for 48 hours. Vinyl expands and shrinks with temperature. Stack the unopened boxes flat in the room where they’ll live so they settle to that room’s climate. Skip this and a floor laid in a cool room can buckle when July heat hits it.
- Plan your first row. Measure the room’s width and divide by a plank’s width. If the last row would come out skinnier than about 2 inches, trim your first row down so both edges look balanced. Lay planks parallel to the longest wall or toward the main window; it makes the room read bigger.
- Set your expansion gap. Push spacers against the wall so the whole floor floats about 1/4 inch off every wall. This gap is non-negotiable. It’s what lets the floor breathe, and baseboards hide it later.
- Lay the first row, then start clicking. Angle each plank’s tongue into the groove of the one before it and press down until it snaps flush. Stagger the end seams by at least 6 inches row to row, like brickwork, so seams never line up. Cut the leftover end of one row to start the next; that’s your built-in stagger.
- Tap the seams tight. Set the tapping block against the plank’s edge and give it a light mallet tap to close any hairline gap. Light. You’re persuading, not hammering.
- Fit the last row. It’ll almost never be a full plank wide. Measure the gap (minus the expansion gap), scribe the line, score deep with your utility knife, and snap. Use the pull bar to draw that final row snug against the wall.
- Pull the spacers and set your trim. Off come the spacers, on go the baseboards or quarter-round, nailed to the wall and not to the floor, so the floor can still move underneath. Add transition strips in doorways where the vinyl meets carpet or tile.
That’s the entire method. Scoring vinyl is oddly satisfying too: you don’t cut all the way through, you score the top with the utility knife and bend the plank until it snaps clean along the line. No dust, no noise, no saw for the straight cuts.
How to handle doorframes, pipes, and the last row
The straight middle of the room is easy. The edges are where first-timers slow down, so here’s how I get through them without swearing. For door frames, don’t try to notch the plank to hug the trim. Undercut the trim instead: lay a scrap plank flat as a height guide and run a flush-cut saw along the bottom of the casing, then slide your real plank underneath. It looks like the floor was built into the wall.
For a radiator pipe or a toilet flange, mark where the circle lands on the plank, drill a hole a hair bigger than the pipe, then cut a slot from the plank’s edge to that hole with your jigsaw or knife. Slide it around the pipe and glue the little wedge back in. From standing height nobody ever sees the seam. And around a toilet, I lay the vinyl and cut to the flange rather than pulling the toilet, unless the toilet’s coming up anyway for other work. One caution worth two minutes of reading: indoor air. The U.S. Environmental Protection Agency keeps plain-language guidance on formaldehyde and emissions in composite and vinyl flooring, and any reputable plank lists its emissions certification on the box, so check for it before you buy a bargain-bin pallet.
How long it takes and what it really costs to DIY
Time is the honest question, because “a weekend” means different things in a bathroom versus a whole main floor. Here’s roughly what each space takes a careful first-timer, plus where the difficulty actually lives. This is the table I wish I’d had before my first room.
| Room | Approx. size | First-timer time | Where it gets fiddly |
|---|---|---|---|
| Small bathroom | 40 sq ft | 4 to 6 hours | Cutting around the toilet flange and vanity |
| Bedroom (simple rectangle) | 150 sq ft | A half to full day | Closet doorway; the last row against the wall |
| Living room | 320 sq ft | 1 full weekend | Undercutting door casings; long straight rows |
| Open main floor | 1,000 sq ft | 2 to 3 weekends | Transitions between rooms; keeping the stagger clean |
The mistakes that cost you twice
- Skipping the expansion gap. Butt the planks tight to the wall and a sunny room will push the whole floor into a buckled ridge by midsummer, and the only fix is pulling up rows to re-cut the edges.
- Lining up your end seams. Stack the short joints row over row instead of staggering them and you get weak, visible seams that pop apart under foot traffic, which means re-laying that whole stretch of floor.
- Buying too few boxes. Order exactly your square footage with no waste factor and one bad cut leaves you short, and since dye lots change between orders, the replacement planks show up a shade off and the mismatch shows.
Grab my free Project Cost Estimator
I put the tools, the materials, and the 10% waste factor onto one printable sheet so you can price your exact room before you drive to the store. Measure the space, jot your plank price, and you’ll know your real vinyl plank flooring number before you commit a single dollar. No upsell, no fluff.
Should you ever pay a pro instead?
I push almost everyone to try click-lock themselves, but I won’t pretend it’s always the move. Two situations where I’d hand it off. First, a badly out-of-level subfloor across a big area, because pouring and troweling leveling compound over a whole main floor is slow, heavy, and easy to botch. Second, stairs. Stair treads on vinyl are fiddly, they need nosing pieces and precise cuts, and a wobble there is a safety issue, not a cosmetic one. If you do hire those parts out, vet the installer the way the U.S. Federal Trade Commission lays out: get the scope in writing, check reviews, and never pay in full up front. Once you know how to install vinyl plank flooring on a flat, open floor, that part of the job is yours to keep. If you like the momentum, my weekend DIY projects roundup has more you can knock out in a Saturday, and the hardwood floor installation cost guide is worth a look if you’re comparing floors room by room.
FAQ
How hard is it to install vinyl plank flooring yourself?
For click-lock rigid-core vinyl, it’s beginner-friendly, which is why it’s the one big flooring job I tell people to try. There’s no glue, no wet saw, and no drying time. You score planks with a utility knife and snap them, then click them together like a puzzle. The learning curve is one or two planks long. If you can measure a room and stay patient around doorways, you can do it.
Do you need underlayment under vinyl plank flooring?
Usually not, if your planks have an attached pad, which most good SPC rigid-core does. Check the box. If the planks are bare, add a thin foam or cork underlayment rated for vinyl, roughly $0.30 to $0.60 a square foot, over a wood subfloor. Over concrete, a moisture barrier matters more than cushion. Don’t double up padding you already paid for in the plank.
Which direction should vinyl plank flooring run?
Run the planks parallel to the longest wall, or toward the main source of natural light, which makes a room feel larger and the seams less obvious. In a hallway, run them the length of the hall. Consistency across an open floor plan matters most, so pick one direction and carry it through doorways rather than switching room to room.
Can you install vinyl plank flooring over existing tile or wood?
Yes, and it’s one of vinyl’s best tricks. Floating click-lock vinyl can go right over tile, hardwood, or old vinyl as long as the existing floor is flat, solid, and clean. It skips the whole demolition-and-disposal step, which saves real money. Fill deep grout lines on tile first so they don’t telegraph through, and make sure the old floor isn’t loose or bouncing anywhere.
How much money does installing it yourself actually save?
Labor for click-lock vinyl usually runs $1.50 to $3 a square foot, so on a 200-square-foot room you’re keeping roughly $300 to $600 in your pocket. On my own 180-square-foot kitchen, materials cost about $500 against a $1,150 quote. The bigger the flat, open area, the more DIY saves, since labor is close to half the installed price on most jobs.
Costs and times here are 2026 estimates and vary by region, room shape, plank type, and the condition of your subfloor. I share what I’ve learned doing my own floors, not professional flooring or contracting advice. When in doubt about a structural or moisture issue, get a pro to look before you lay anything.
Free DIY Project Cost Estimator
The spreadsheet I use to price out a project before I start, so a weekend job never blows the budget. Join the newsletter and I’ll send it over.
No spam, ever. Unsubscribe anytime. — Tessa
Keep reading — more on Easy DIY & Repairs
Water Heater Flush: How to Do It Yourself (and What a Plumber Charges)
The first winter in this house, the water heater in my basement started making a noise…
Read article →
Mini Split Maintenance: The DIY Checklist and What a Pro Charges
The smell showed up first. Our mini split lives in the room over the garage, the…
Read article →
How to Patch a Drywall Hole (The Three Sizes, and the One You Should Not DIY)
The doorknob went through the hallway wall on a Tuesday, and I want to be honest…
Read article →
How to Fix a Dripping Kitchen Faucet (Cartridge, O-Rings, and the Sprayer Hose Nobody Checks)
My kitchen faucet dripped for a summer. I told myself it was the aerator, because the…
Read article →