
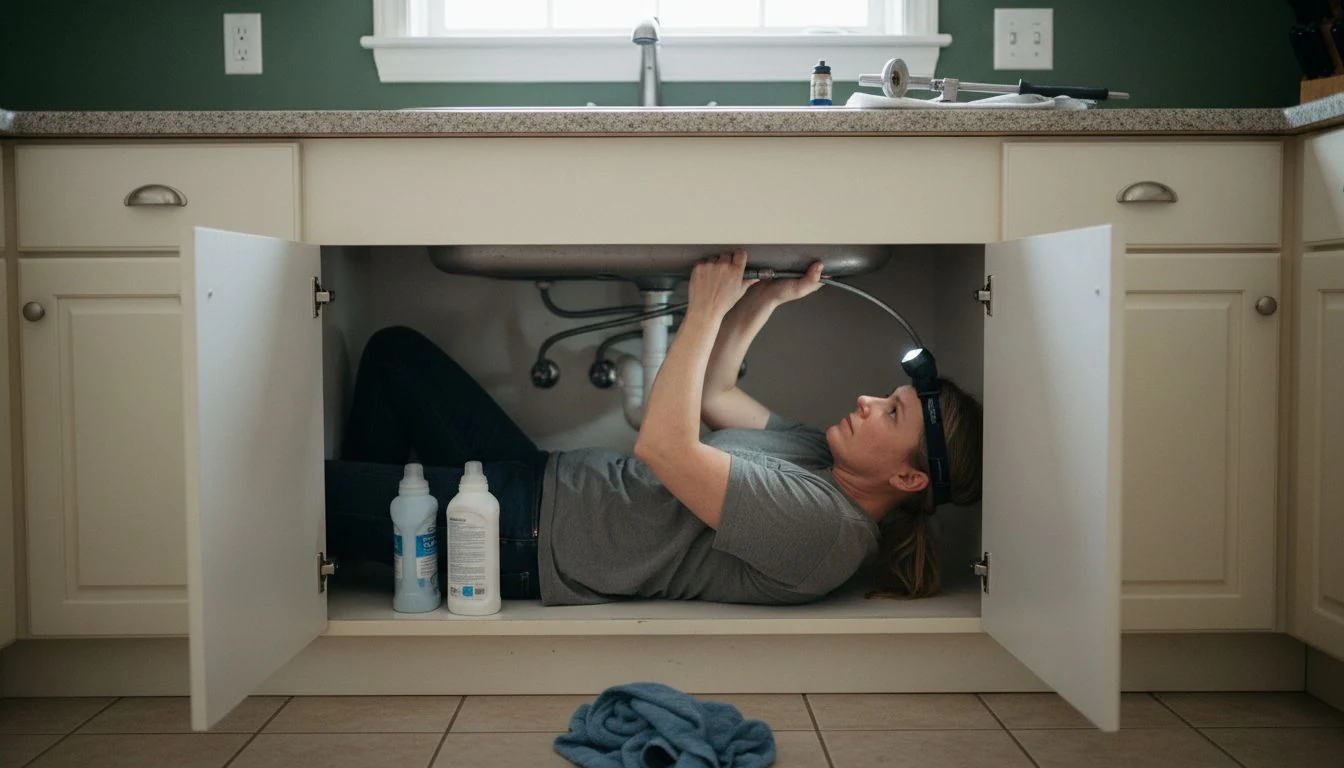
My kitchen faucet dripped for a summer. I told myself it was the aerator, because the aerator is the thing you can reach without lying on your back in a cabinet. It was not the aerator. It was a $38 cartridge, and the whole repair took me an hour and ten minutes once I finally stopped avoiding it.
This repair works differently from every other faucet in the house. Learning how to fix a dripping kitchen faucet is less about the valve and more about tracking down where the water starts, because a kitchen faucet has four or five places it can leak and only one of them is the part most people replace first.
Under a bathroom sink you get a bare trap and room to work. Under a kitchen sink you get a garbage disposal, a filter, a bin of half-empty cleaners, and a hose that reaches out and grabs your wrist. Diagnose it right and this is a cheap Saturday. Diagnose it wrong and you buy a cartridge that was never the problem.
Jump to what you need:
- Find where the water is actually coming from
- The four valve types under a kitchen handle
- Clearing the cabinet, and the tools worth having
- Single handle, step by step
- Two handles is a different, cheaper job
- When it is the sprayer hose, not the faucet
- When to replace the whole faucet instead
- What it costs, DIY vs. plumber
- FAQ
Before you fix a dripping kitchen faucet, find where the water is actually coming from
Do this before you buy a single part. It takes ten minutes and it is the whole job.
Dry everything. The spout, the base, the deck around the faucet, the shutoff valves below, and the floor of the cabinet. Lay a sheet of paper towel across the cabinet floor and another around the base of the faucet on the countertop. Then run the faucet hot for thirty seconds, cold for thirty seconds, and shut it off. Come back in twenty minutes and read the paper towels.
Water in the spout with the handle off is the cartridge or the seals inside the valve. That is the classic drip and it is what most people have.
Water pooling on the counter around the base of the faucet, but only while it is running, is not the cartridge at all. That is the o-rings on the spout body, and the fix is a $5 o-ring kit rather than a $40 cartridge. I have watched people replace three cartridges chasing a base leak.
Water on the floor of the cabinet with the faucet shut off points at the supply lines or the shutoff valves. Wet only while running points at the sprayer hose or its quick-connect. And a fine spray or an uneven stream out of the end is the aerator, which is not a leak at all, just calcium.
Write down which one you have. Everything from here branches off that.
The four valve types under a kitchen handle
Kitchen faucets have narrowed down to four internals, and the one you own decides the part number and the price.
Ceramic disc. A single lever that swings up and side to side, with a wide cylindrical body under the handle. Most kitchen faucets sold in the last fifteen years. The discs themselves almost never wear out. What fails is the rubber seal ring underneath, and a $10 seal kit fixes it more often than a full cartridge does.
Cartridge. Also a single lever, but a slimmer stem. Moen owns most of this territory in American kitchens. Replaceable as a unit, usually $25 to $50 for the brand part.
Ball valve. Single handle that rotates loosely over a domed cap, almost always Delta on an older kitchen. It takes a repair kit with springs and rubber seats, around $15, and you replace the small parts rather than the assembly.
Compression. Two separate handles, hot and cold. Older houses. Rubber seat washers wear out and cost a couple of dollars.
Now find the brand, because the type alone will not get you the right part. Pop the red and blue button off the top of the handle with a small flathead, or check the underside of the spout, or look for a sticker inside the cabinet door where the installer left the paperwork. Moen, Delta, Kohler, Pfister and American Standard all mark their parts. Photograph the old cartridge before you drive anywhere. This is the same discipline that saved me on the shower job I wrote up in how to fix a leaking shower faucet, where I guessed at the brand and made two trips.
Clearing the cabinet, and the tools worth having
My first twenty minutes went by on the floor with a flashlight, before I touched any plumbing at all.
Empty the cabinet. Every bottle, the trash pull-out, the little bin of sponges. Put a folded towel down for your back and a second one under the trap, because you will bump the slip nuts and they weep. Then get a headlamp. A phone propped on the disposal falls over in about four minutes, and both your hands are going to be above your face working blind.
- The correct cartridge, seal kit or repair kit. $5 to $50 depending on which one the paper towel test pointed you at.
- Allen key set. Nearly every single-handle kitchen faucet is held on by a hex set screw hidden under the front or back of the handle, not a screw you can see.
- Basin wrench, about $15. The one tool with no substitute if you end up touching the mounting nuts or the supply lines up behind the sink.
- Channel locks and needle-nose pliers.
- Plumber’s silicone grease, two dollars. Thin film on every o-ring going back in. Petroleum jelly eats the rubber, so it is not a substitute.
- White vinegar and an old toothbrush for the mineral crust, which in hard water is thicker than you expect.
Total, if you own nothing, is still under $70 including the part.
How to fix a dripping kitchen faucet, step by step
This is the single-handle version, ceramic disc or cartridge, which covers most kitchens. Give yourself two hours the first time.
- Shut the water off at the two angle stops under the sink, hot and cold. Then open the faucet to bleed the pressure and confirm both seated. Old multi-turn stops seize and fail to seat, which is its own repair.
- Plug the drain. A rag, a stopper, anything. Set screws are tiny and they roll.
- Pull the handle. Pry off the cap or the brand button, back out the hex set screw two or three turns without removing it entirely, and lift the handle straight up.
- Take off the dome or the retaining nut. Wrap the jaws of your pliers in a rag first so you do not scar the finish. Some brands use a plastic collar you turn by hand.
- Photograph the orientation. Cartridges seat one way. Flipped, you get reversed hot and cold, which is the most common reason a repair looks like it failed.
- Lift out the cartridge or disc assembly. Twist it a quarter turn each way to break the mineral seal, then pull straight up. If it will not move, vinegar in the valve body for forty-five minutes, then try again. Do not lever it sideways.
- Clean the valve body. Vinegar and the toothbrush, then wipe. Look for grit and pitting on the seats while you are down there.
- Replace the seals too. On a ceramic disc faucet the rubber rings under the cylinder are the actual failure point most of the time. Even if you bought the full cartridge, swap them.
- Grease and reassemble in the same orientation, snug the retaining nut without gorilla-ing it, and put the handle back on.
- Test with the cabinet still open. Water on, run hot and cold at full pressure, then leave it off and check the paper towels again after fifteen minutes.
The step I skipped my first time was the aerator. Ten years of scale in the screen makes the stream weird, and if you have just spent an hour inside the faucet you will blame yourself. Unscrew it, soak it in vinegar while you work, brush it out, put it back.
Two handles is a different, cheaper job
Separate hot and cold handles almost always means compression stems, and the leak is a worn rubber seat washer at the bottom of one stem. The part is under three dollars.
Close the hot supply only and see whether the drip stops. If it does, you rebuild one side instead of two. Then unthread the whole stem out with a deep socket, take the brass screw out of the bottom, and fit the matching washer.
Do not stop there. Run a seat wrench into the valve body and feel the brass seat the washer presses against. If it is rough, back it out and fit a new one. A fresh washer against a chewed-up seat starts dripping again inside a month, and that is exactly why people insist rebuilding an old two-handle faucet does not work. It works. The seat is the step everybody skips. Same principle I ran into on the outdoor spigot repair.
When it is the sprayer hose and not the faucet
This one is kitchen-only, and it is the leak that gets misdiagnosed most.
If the cabinet floor is wet only while the water is running, and the top of the faucet is bone dry, reach under and run your hand along the pull-down hose from the spray head all the way to the quick-connect fitting at the supply. Three things fail there. The hose itself splits where it has been rubbing on the edge of the cabinet cutout for a decade. The quick-connect collar loses its grip. Or the counterweight has slid down and is dragging the hose against something sharp.
A replacement pull-down hose runs $20 to $45 from the manufacturer and clips on in about fifteen minutes with no tools. If the collar is the problem, it usually just needs to be pushed fully home until it clicks. Mine had never been seated properly by the installer and had been weeping for who knows how long.
There is also a diverter inside the faucet body that sends water to the spray head. When that wears, water dribbles from the spray head while the main stream is running. That is a small part, around $15, and it lives under the spout.
When to replace the whole faucet instead of fixing it
Most repair guides will tell you to fix it. I disagree, and the reason is the counter.
A shower valve sits buried in a tiled wall, so you repair it almost no matter what. A kitchen faucet sits on top of the counter where both your hands can reach it, and a solid replacement runs $90 to $250. That changes the math. If the body is corroded, if the finish is flaking, if the brand went under and parts are guesswork, or if this is the second repair in two years, replace it. You spend an extra hour and stop thinking about it for fifteen years.
Something to check when you shop. A kitchen faucet is a drinking water fixture, so it falls under the Safe Drinking Water Act rule defining “lead free” as a weighted average of 0.25 percent lead across the wetted surfaces, and since September 2023 manufacturers have to certify it. Shower valves and tub fillers are exempted by name in that rule. Your kitchen faucet is not. Look for the certification mark on the box, and be careful with vintage or imported faucets that never carried one.
And if the sink is coming out anyway for other work, do the faucet at the same time. The labor overlaps almost entirely, which I broke down in my kitchen countertop replacement costs guide, and it is a line item in the bigger kitchen remodel cost picture too.
What it costs to fix a dripping kitchen faucet yourself vs. a plumber
Start with the diagnostic table, because the paper towel test in the first section maps directly onto the part you buy. This is the sheet I wish I had taped inside the cabinet door.
| Where the water shows up | What is actually failing | Part you need | Part cost | Your time |
|---|---|---|---|---|
| Drips from the spout, handle off | Cartridge or disc seals | Brand cartridge or seal kit | $10 to $50 | 45 to 90 min |
| Pools on the counter at the base, only while running | Spout body o-rings | O-ring kit and silicone grease | $5 to $15 | 30 to 60 min |
| Cabinet floor wet only while running | Pull-down sprayer hose or quick-connect | Replacement hose or reseat the collar | $0 to $45 | 15 to 40 min |
| Cabinet floor wet with everything off | Supply line or angle stop | Braided supply line, or new quarter-turn stop | $12 to $35 | 30 min to 2 hr |
| Spray head dribbles while main stream runs | Worn diverter in the faucet body | Diverter kit | $10 to $20 | 30 to 45 min |
| Weak, split or spitting stream | Mineral scale in the aerator | Nothing, or a $4 aerator | $0 to $6 | 15 min plus soak |
| Drip from two-handle faucet | Seat washer, and usually the brass seat | Washer kit and seat wrench | $5 to $20 | 1 to 2 hr |
| Water under the handle base on a wall of the sink deck | Loose mounting nuts or failed deck gasket | Plumber’s putty or gasket, basin wrench | $5 | 45 min |
Then the money question. A plumber’s number here is mostly the minimum service call, not the minutes.
| Job | DIY, all in | Plumber, installed (2026 est.) |
|---|---|---|
| Cartridge or seal replacement | $10 to $50 | $165 to $375 |
| Sprayer hose replacement | $20 to $45 | $140 to $285 |
| New supply lines, both sides | $24 to $40 | $150 to $300 |
| Replace a seized angle stop | $15 to $35 | $200 to $450 |
| Full faucet replacement, faucet included | $90 to $250 | $320 to $700 |
My repair was $38 in parts. And the water is not nothing either: EPA WaterSense puts the average household at 180 gallons a week, or 9,400 gallons a year, lost to leaks, which across the country adds up to nearly 900 billion gallons annually. A kitchen faucet is usually the one running the most hours in the house.
Where people go wrong on this repair
- Buying a cartridge before doing the paper towel test. A base leak and a spout drip feel like the same problem and need different parts. Ten minutes of diagnosis saves a wasted $40 and a return trip.
- Reusing the old rubber seals with a new cartridge. On ceramic disc faucets the seal rings under the cylinder are usually the thing that gave out. New cartridge, old seals, same drip next month.
- Forcing the shutoff valves under the sink. Old multi-turn stops seize, and cranking one that has not moved in twenty years snaps the stem or starts a leak you cannot stop without killing water to the house. If it resists, work it gently back and forth, and plan on replacing it.
Grab my free Project Cost Estimator. Put the part number, your area’s minimum service call, and an honest hour count into the sheet before you phone anyone. That is the comparison that showed me a $38 cartridge and a $285 quote were solving the exact same drip.
Frequently Asked Questions
How do you fix a dripping kitchen faucet without replacing the whole thing?
In most cases you replace one wear part, not the faucet. Dry everything, run the water, and see where it shows up after twenty minutes. A drip from the spout with the handle off means the cartridge or its seals. Water on the counter at the base while running means spout o-rings. Water in the cabinet only while running usually means the sprayer hose. Each of those is a part between $5 and $50 and an hour of your time.
Why does my kitchen faucet still drip after I replaced the cartridge?
Three usual reasons. The cartridge went back in rotated, so pull it and turn it 180 degrees. Or you replaced the cartridge but reused the old rubber seals underneath, which on a ceramic disc faucet are the part that normally fails. Or the seats inside the valve body are pitted from grit and no new part can seal against them, which is the point where replacing the faucet gets cheaper than chasing it.
Do I need to shut off the water to the whole house?
No. Kitchen sinks nearly always have two angle stops on the wall or floor of the cabinet, one for hot and one for cold. Close both, then open the faucet to bleed the line and confirm they sealed. Only if a stop is seized or will not fully close do you go to the main, and in that case replacing the stop is part of the job now.
Is a slow kitchen drip worth fixing right away?
Yes, and mostly for what you cannot see. The leaks that matter are the ones under the sink, because a slow weep from a supply line or a sprayer hose sits on particleboard cabinet floor and swells it long before you notice a puddle. The drip you can hear is the cheap one. Check the cabinet floor while you are in there, the same way I do on any faucet repair, and on the bathtub valve where the damage hides behind a wall.
All prices here are 2026 estimates and vary by region, faucet brand and age, cabinet and shutoff condition, plumbing material, and local labor rates and minimum service charges. Tessa is a hands-on homeowner, not a licensed plumber; use these ranges and steps to ask sharper questions, and confirm code requirements and anything involving supply connections, shutoff valves, or potable water fixtures with a licensed pro in your area.
Free DIY Project Cost Estimator
The spreadsheet I use to price out a project before I start, so a weekend job never blows the budget. Join the newsletter and I’ll send it over.
No spam, ever. Unsubscribe anytime. — Tessa
Keep reading — more on Easy DIY & Repairs
Water Heater Flush: How to Do It Yourself (and What a Plumber Charges)
The first winter in this house, the water heater in my basement started making a noise…
Read article →
Mini Split Maintenance: The DIY Checklist and What a Pro Charges
The smell showed up first. Our mini split lives in the room over the garage, the…
Read article →
How to Patch a Drywall Hole (The Three Sizes, and the One You Should Not DIY)
The doorknob went through the hallway wall on a Tuesday, and I want to be honest…
Read article →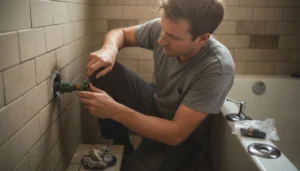
How to Fix a Leaking Shower Faucet: Cartridge, Two Handles, and No Shutoff
The guest shower dripped for eleven months before I did anything about it. Not a fast…
Read article →