
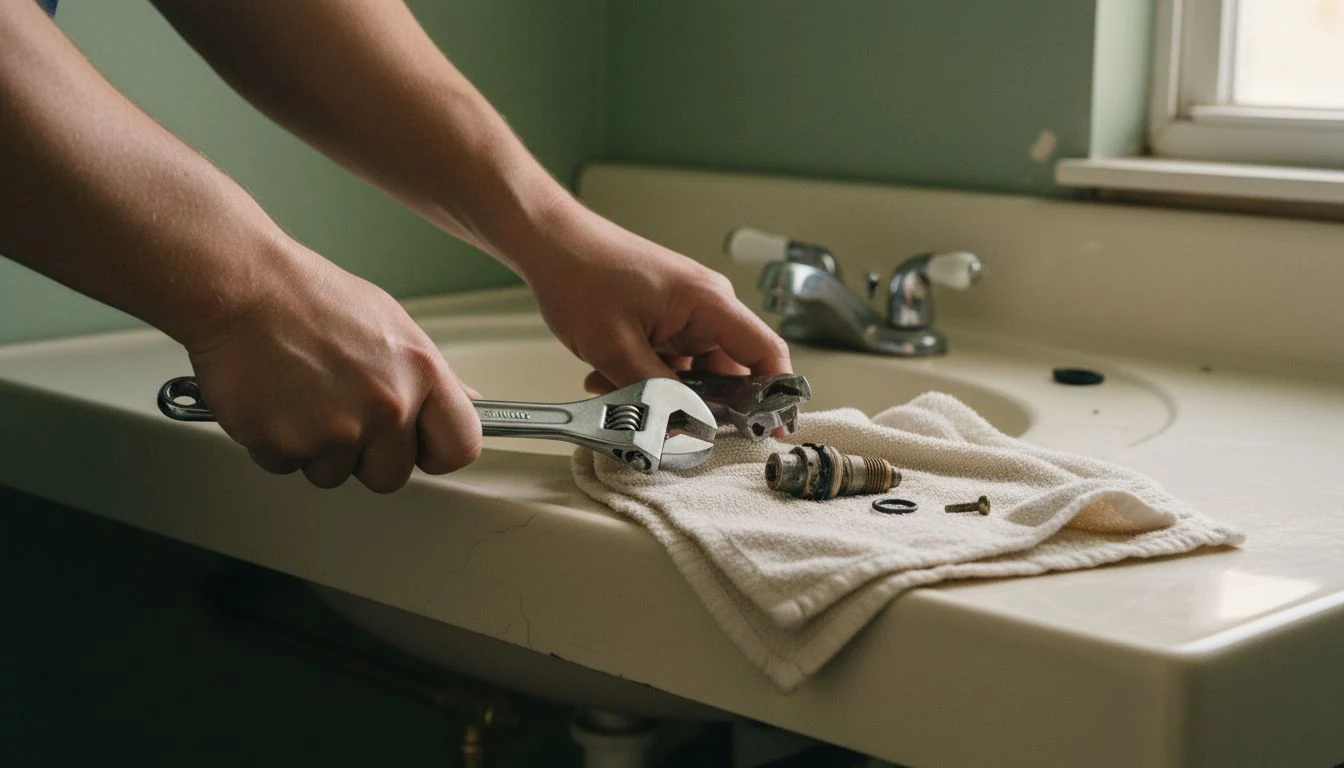
The first night it kept me up. Drip. Fifteen seconds. Drip. My bathroom faucet had started leaking sometime that spring, and I’d been doing the thing everyone does, which is nothing, telling myself it was one loose part and not my problem yet. Then a water bill came in about $14 higher than the month before, and I did the math on a drip. One drip a second is over 3,000 gallons a year down the drain. So one Saturday I shut the water off, took the handle apart on my kitchen counter, and fixed it in about twenty minutes for the price of a coffee.
Here’s the whole thing, start to finish. Learning how to fix a leaky faucet is one of those first-home skills that feels like it should need a plumber and almost never does. Ninety percent of the time it’s a worn washer, a cracked O-ring, or a tired cartridge, and all three are a few dollars and a screwdriver away. I’ll show you how to tell which one you’ve got, and exactly what to do about it.
Jump to what you need:
- Why your faucet is actually leaking
- The tools and parts you’ll need
- How to fix a leaky faucet, step by step
- A drip from the spout vs. a leak at the base
- DIY cost vs. calling a plumber
- FAQ
First, figure out why your faucet is leaking
You can’t fix the leak until you know your faucet type, because the guts are different and so is the fix. There are four kinds under almost every sink in America, and you can usually name yours by how the handle moves.
- Compression faucet. Two separate handles, one hot, one cold, and they screw down tight when you shut them. Oldest design, and the leak is nearly always a flattened rubber washer at the bottom of the stem.
- Cartridge faucet. One handle (sometimes two) that moves smooth and easy. Inside is a plastic or brass cartridge. When it wears, it drips, and you swap the whole cartridge.
- Ball faucet. A single handle that swivels over a rounded cap, common on older kitchen sinks. Lots of little parts inside; a repair kit replaces all of them at once.
- Ceramic disk faucet. A single sturdy handle, newer and pricey. Rarely leaks, but when it does it’s the rubber seals or, less often, the disk cylinder.
Mine was a compression faucet, which is the friendliest one to learn on. If you’re not sure what you’ve got, don’t guess from a distance. You’ll know for certain the second you have the handle off, and I’ll get you there in a minute. The one thing worth doing first is watching where the water shows up, because a drip out the spout and a puddle around the base are two different repairs, and I’ll cover both.
The tools and parts you’ll need
The beauty of this job is how little it asks for. I keep all of this in one small bin under the sink now, because a faucet that leaked once will leak again in a few years, and Future You will thank Past You for not having to run to the store mid-drip.
- An adjustable wrench and a set of screwdrivers (flathead and Phillips)
- Needle-nose pliers
- A rag and an old towel for the counter
- Plumber’s grease (a tiny tub is a couple dollars and lasts years)
- Plumber’s tape, the white teflon kind
- The replacement part for your faucet type: a washer and O-ring kit, or a cartridge, or a ball-faucet repair kit
Buy the part after you open the faucet, not before. I’ve made three trips to the hardware store for one repair because I guessed the cartridge size wrong. Pull the old part, take it with you, and match it in your hand at the store. The staff at the plumbing aisle can match a cartridge by sight faster than you can find it online, and it costs you nothing to ask.
| Faucet type | Most likely cause of the drip | Part you’ll replace | Typical part cost | DIY time |
|---|---|---|---|---|
| Compression (two handles) | Worn seat washer or O-ring | Washer + O-ring kit | $3 to $8 | 20–30 min |
| Cartridge (smooth single handle) | Worn cartridge | Replacement cartridge | $10 to $25 | 20–40 min |
| Ball (swivel single handle) | Worn springs, seats, or cam | Ball-faucet repair kit | $15 to $30 | 40–60 min |
| Ceramic disk (sturdy single handle) | Worn rubber seals | Seal set (or disk cylinder) | $10 to $40 | 30–50 min |
How to fix a leaky faucet, step by step
This is the core of it, and the steps are the same in spirit for every faucet type. The only thing that changes is the part in the middle. Go slow the first time. It’s not hard, but it is fiddly, and the mistakes are all avoidable.
- Shut off the water. Reach under the sink and turn both little valves clockwise until they stop. No shutoffs down there? Turn off your home’s main. Then open the faucet to bleed off the pressure and confirm the water’s actually off. Skip this step and you’ll repaint your ceiling.
- Plug the drain. Drop the stopper or lay the rag over the drain hole. I learned how to fix a leaky faucet and how to fish a tiny brass screw out of a P-trap on the same afternoon. Don’t be me.
- Pop off the handle cap and unscrew the handle. There’s usually a little decorative cap on top hiding a screw. Pry it up gently with a flathead, back out the screw, and lift the handle off. If it’s stuck from mineral buildup, a little wiggling beats forcing it.
- Take out the working part. For a compression faucet you’ll unscrew the packing nut and pull the stem; the culprit washer is screwed to the bottom. For a cartridge, pull the retaining clip with needle-nose pliers and slide the cartridge straight up and out. Note which way it faces. Phones were made for this photo.
- Replace the worn piece. Swap in the new washer, O-ring, or cartridge. Dab a little plumber’s grease on any rubber part so it seats smoothly and lasts longer. This tiny step is the difference between a fix that holds for years and one that drips again by fall.
- Reassemble in reverse. Working part back in, handle back on, screw and cap on top. Snug, not gorilla-tight; over-tightening cracks parts and creates the next leak.
- Turn the water back on slowly. Open those shutoff valves gently, then run the faucet and watch. A few seconds of sputter is just trapped air. Watch the base and the spout for a full minute. Dry? You just fixed it.
The whole thing took me about twenty minutes once I stopped panicking about the water being off. If you want a warm-up on the same skills with a fixture where a mistake floods the yard instead of the bathroom, my walk-through on fixing a leaky outdoor faucet uses the same shut-off-and-swap logic on an outdoor spigot.
A drip from the spout vs. a leak at the base
Where the water shows up tells you which part failed, and this is the single most useful thing to know before you open anything. Two leaks, two different insides.
Dripping from the spout when the faucet is fully off is a worn washer, seal, or cartridge, the internal parts I’ve been describing. That’s the common one and the steps above fix it.
Water pooling around the base of the faucet when you turn it on is a different animal. That’s usually a bad O-ring around the spout body or a loose mounting nut underneath, not the same washer. You still shut the water off and open it up, but the part you’re chasing is the larger O-ring where the spout meets the base. While you’re under there, a wrench-turn on the mounting nuts and a wrap of plumber’s tape on the supply connections often stops a base leak for good.
One honest warning. If the water is coming from the supply lines or the shutoff valves themselves, not the faucet, that’s a plumbing repair, not a faucet repair, and worn-out hot-water lines can tie into a bigger issue. If your hot side has been trouble for a while, it’s worth knowing what a water heater replacement costs before a small drip becomes a wet floor.
What it costs to fix a leaky faucet yourself vs. a plumber
Here’s the part that makes the twenty minutes worth it. Doing this yourself is one of the highest-return small jobs in the whole house, purely on the dollars.
The DIY version costs you the part and nothing else: $3 to $8 for a washer kit, up to about $25 for a name-brand cartridge. Call it $5 to $30 out of pocket, plus a Saturday morning. A plumber for the same job usually runs $125 to $350, because most charge a minimum service call of $75 to $150 just to show up, and the actual repair is fifteen minutes of their time on top. You’re paying for the truck roll, not the washer.
That’s a swing of a hundred dollars or more for a job you can genuinely learn in one sitting. And the savings compound. Fixing that drip doesn’t just save the repair bill, it stops the water waste. The EPA notes that fixing easily corrected household leaks can save homeowners about 10 percent on their water bills, and that household leaks nationwide waste close to 900 billion gallons a year. Your one faucet is a small piece of that, but it’s a piece you control with a $4 washer.
If a plumber does quote you, the same rule I use for every trade applies: know the fair range before they arrive. My guide on telling whether a contractor quote is fair covers what a real service-call minimum looks like, and if you’re pricing out a string of small fixes, it all rolls up into the bigger picture of what home projects cost in 2026.
What turns a simple faucet fix into a headache
- Skipping the shutoff. The number one way this goes sideways. Never trust that the water’s off because the handle feels off; open the faucet after closing the valves and watch it die to a trickle first. A faucet under pressure when you pull the cartridge sprays the whole room.
- Losing the small parts. Handle screws, retaining clips, and O-rings love the drain. Plug it before anything comes apart, and lay the pieces on a towel in the order they came off so reassembly is just the same steps backward.
- Buying the wrong part. Cartridges and washers are maddeningly brand-specific. Pull the old one first and match it in your hand at the store; a photo and a hopeful guess is how a twenty-minute job becomes a three-trip weekend.
Grab my free Project Cost Estimator. Before you decide between a $4 washer and a $200 plumber call, it lays out the fair DIY-versus-hire range for the small repairs every first home throws at you, so you meet any quote already knowing your own number.
Frequently Asked Questions
How do I fix a leaky faucet without replacing the whole thing?
You almost never have to replace the faucet. Shut the water off, take the handle apart, and swap the one worn part inside: a washer and O-ring on a two-handle compression faucet, or the cartridge on a smooth single-handle one. That inside part is a few dollars and fixes the drip. You’d only replace the whole faucet if the body itself is cracked or corroded, which is rare.
Why does my faucet still drip after I replaced the washer?
Two usual reasons. Either the part doesn’t quite match your faucet, or the metal “seat” the washer presses against is pitted and scratched, so a fresh washer still can’t seal. A cheap seat-dressing tool smooths that surface, or a small seat wrench swaps it out. If it still drips after a matched part and a clean seat, the cartridge or valve body is worn and that’s the next piece to replace.
Is a dripping faucet an emergency?
No, but don’t let it ride for months either. A single drip won’t flood anything, yet at one drip per second it quietly wastes over 3,000 gallons a year and inflates your bill. Water pooling at the base or coming from the supply lines is more urgent, since that can reach cabinets and floors. A spout drip you can fix this weekend; a base or supply leak, sooner.
All prices here are 2026 estimates and vary by faucet brand, region, and your local plumber’s rates. Tessa is a hands-on homeowner sharing what’s worked in her own house, not a licensed plumber. For anything past the faucet itself, shut off your water and, when in doubt, call a pro.
Free DIY Project Cost Estimator
The spreadsheet I use to price out a project before I start, so a weekend job never blows the budget. Join the newsletter and I’ll send it over.
No spam, ever. Unsubscribe anytime. — Tessa
Keep reading — more on Easy DIY & Repairs
Water Heater Flush: How to Do It Yourself (and What a Plumber Charges)
The first winter in this house, the water heater in my basement started making a noise…
Read article →
Mini Split Maintenance: The DIY Checklist and What a Pro Charges
The smell showed up first. Our mini split lives in the room over the garage, the…
Read article →
How to Patch a Drywall Hole (The Three Sizes, and the One You Should Not DIY)
The doorknob went through the hallway wall on a Tuesday, and I want to be honest…
Read article →
How to Fix a Dripping Kitchen Faucet (Cartridge, O-Rings, and the Sprayer Hose Nobody Checks)
My kitchen faucet dripped for a summer. I told myself it was the aerator, because the…
Read article →