
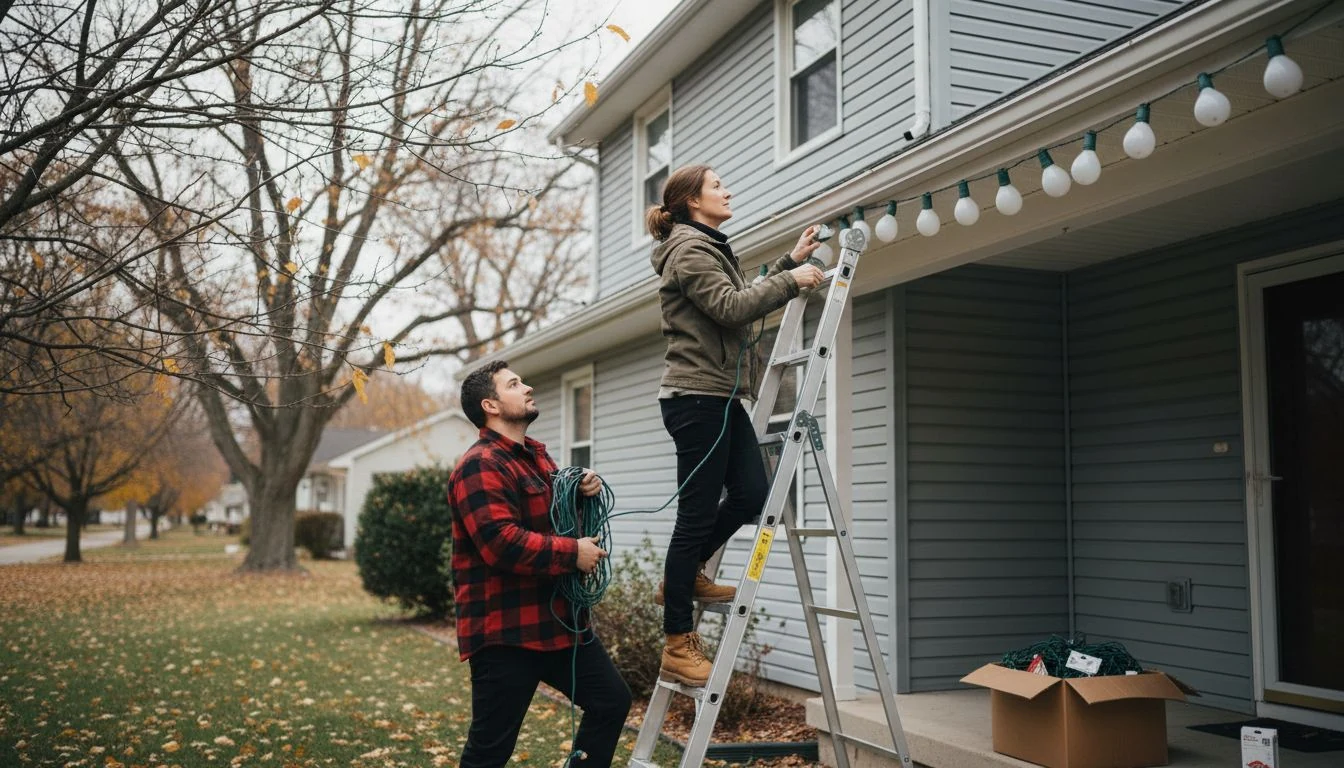
My first year figuring out how to hang Christmas lights outside, I went up the ladder eleven times. I counted afterward, sitting on the porch step with cold hands and a box of strands I’d bought too short. I ran out of clips at the corner of the garage, came down, drove to the hardware store, came back, and discovered the extension cord wouldn’t reach the outlet by the door. The whole job took a Saturday and a half for a single row of bulbs along the front gutter.
Last year the same roofline took me an hour and forty minutes with one trip up per section, and I didn’t put a single nail into a house I don’t own. Nothing about my ladder skills changed. I did the planning on the ground first, I bought clips that matched the surface, and I tested every strand on the living room floor before it went anywhere near the gutter.
I’m Tessa. I rent a two-story with vinyl siding and a landlord who reads his lease out loud, so everything below comes off in January without a mark. This is the order I work in now, start to finish.
Measure the roofline before you buy a single strand
This is the step that would have saved me the most ladder trips, and it takes ten minutes with a tape measure from the lawn.
Walk the house and measure every run you want lit: the gutter line across the front, each roof edge that slopes, the porch rail, the path. Write them down. Then add the distance from the end of each run to the nearest outdoor outlet, because that gap is where my first year fell apart. My front gutter is 38 feet. The outlet is on the porch post, 14 feet from the left corner. I needed 38 feet of lights and a 25-foot cord, and I’d bought two 25-foot strands and a 15-foot cord.
Buy about 10 percent more light than you measured. Strands start a few inches from the plug, corners eat length, and you’ll want slack to drop down to the cord without stretching anything tight.
One more thing to check from the ground: whether your gutters are clean. I wrote up what gutter cleaning costs and when it’s worth paying for because clips snapped onto a gutter full of wet leaves pop off in the first windy night, and you don’t want to be up there twice.
Pick the clip by the surface, and skip the nails
The clip aisle looks like forty products. It’s really four, and the right one depends on what you’re attaching to.
Gutter clips hook over the front lip of the gutter and hold the bulb socket upright. They’re the cheapest and fastest for a straight run, and they’re what I use on the front of the house. All-in-one clips do double duty: one end hooks the gutter lip, the other slides under the edge of a shingle, so you can follow the roof edge up a gable without changing products halfway. Shingle tabs slide under the bottom row of asphalt shingles only. And for siding, brick, or a window frame, there are adhesive clips with a peel-off backing.
I bought a 100-pack of all-in-one clips for $11 and used 64 of them. One clip every 12 inches on a straight gutter run, closer on corners and slopes. If you’re using C9 bulbs, which are the big classic ones, put a clip at every socket so the bulbs stand straight up instead of flopping sideways like loose teeth.
Nails, staples and those cup hooks people screw into fascia boards punch holes that let water in behind the trim. On a rental, that’s your deposit. On a house you own, it’s a soft spot in the fascia in three years. Plastic clips cost pennies each and come off with a flick.
Adhesive clips are the one product I’d buy with care. The cheap ones I tried on my vinyl siding let go the first night it dropped below freezing. The ones rated for outdoor and cold use held through February. Stick them on a dry day above about 50 degrees, press for thirty seconds, and give them a day before you hang anything.
Test every strand on the floor first
Plug in every strand inside the house, on the floor, before it goes outside. I found two dead sections my second year this way, and finding them at eye level with a cup of coffee beats finding them 12 feet up with numb fingers.
Check the cord at the plug end too. If there’s cracked insulation, a crushed wire, or a bent prong, throw that strand out. The Consumer Product Safety Commission’s holiday safety guidance also says not to connect more than three sets of incandescent lights together. LED strands usually allow far more end to end, but the number is printed on the tag near the plug, so read it rather than guess. I keep the tag on the strand with a twist tie for exactly this reason.
While you’re inside, clip the lights into their clips. This is the trick that turned eleven ladder trips into four. I lay the strand along the hallway floor, snap a clip onto every socket, and coil the whole thing loosely over my forearm with the clips already attached. On the ladder, all I do is hook each clip over the gutter lip and move on.
How to hang Christmas lights outside in one ladder trip per section
Start at the outlet end, never the far end. If you start at the far corner and work back toward the power, you’ll arrive at the outlet with either 3 feet of extra strand or 3 feet too little, and both mean redoing the run.
- Set the ladder at the outlet end of the first run. OSHA’s portable ladder safety card puts the base a quarter of the ladder’s working length out from the wall, so a ladder touching the gutter at 16 feet has its feet about 4 feet from the house.
- Have someone foot the ladder and hand you the coil. My neighbor Dev did this for a plate of cookies. The second person is the reason you don’t come down for the clips you forgot.
- Hook the first clip at the corner nearest the outlet, leaving the plug hanging low enough to reach the cord without strain.
- Clip along until you can’t reach comfortably with your belly button inside the rails. Then come down and move the ladder. Leaning out to get two more clips is how people fall.
- Repeat to the end of the run. Tuck the last few inches of the strand behind the downspout or wrap them around the gutter bracket so they don’t dangle.
Two OSHA rules I treat as law here. Keep three points of contact while you climb, two hands and a foot or two feet and a hand, which means the coil goes over your shoulder rather than in your hand on the way up. And don’t stand on the top step of a stepladder or the top three rungs of an extension ladder. If you can’t reach the gutter from below that point, you need a taller ladder, not a longer stretch.
Look up before you set the ladder, too. Metal ladders near overhead power lines are on that same OSHA card for a reason, and the service drop to most houses runs right along the roof edge where you’re working.
Christmas lights on a second story
I don’t do the second-story eaves on my house. It’s a 24-foot reach over a sloped flower bed, and that’s past what I’m willing to do with a borrowed extension ladder and Dev’s cookie-fueled goodwill. The front first-floor gutter and the porch carry the whole look from the street anyway. If you want the top roofline lit, that’s the run I’d pay someone for, and I’ll get to what that costs below.
Power, cords and the timer that pays for itself
Every cord outside needs to be rated for outdoor use. It says so on the jacket or the tag, usually with a “W” in the rating. Indoor cords crack in the cold and aren’t built for wet ground.
Plug into an outlet with GFCI protection, the kind with the test and reset buttons. Most newer outdoor outlets already have it. Mine on the porch post didn’t trip the first time I pressed test, so I bought a plug-in outdoor GFCI adapter for about $18 rather than ask the landlord to replace the outlet in December.
Lift every plug connection off the ground. I set mine on an upside-down terracotta pot under the porch overhang, and a zip-top bag over the joint keeps the rain off. Water pooling around a connection is what trips the GFCI at 7 p.m. on the night your in-laws drive by.
Get a timer. An outdoor plug-in timer was $14, and it means the lights are on from 5 to 11 every night without me remembering. My electric bill for the season went up about $4 with LED C9s. The incandescent strands I had in my old apartment ran closer to $20 for the same stretch of weeks, which is the main reason I stopped buying them.
Christmas lights outside without a ladder at all
Half of what makes a house look lit from the street happens at ground level, and none of it needs a ladder.
Bushes: drape a net light over the top instead of wrapping a strand around and around. Net lights cost about $15 for a 4-by-6-foot panel and take two minutes per shrub. Porch railings: clip the strand under the top rail with the same all-in-one clips, or zip-tie it every 18 inches and snip the tails flush. Pathways: stake lights push into the lawn, but put them in before the ground freezes, which in my area means before Thanksgiving.
The cozy stuff inside the window counts too. If you’re doing the front window anyway, I put together a dollar store Christmas centerpiece that reads from the sidewalk at night when the room light is off and a strand of warm white is on.
Should you hire someone to hang Christmas lights outside?
I got two quotes last November because I wanted to know what I was saving. One company quoted $425 to hang my own lights along the front first-floor gutter and porch, take them down in January, and store nothing. The other quoted $1,150 for a full roofline package with their lights, installation, removal and storage. Both included the second-story eaves I won’t do myself.
For a one-story house with a straight gutter, I’d DIY it every year. For a two-story roofline, a steep pitch, or anyone without a second person to foot the ladder, the pro price is the price of not being the person in the emergency room in December. Ask whether the quote includes takedown, whether they use their own lights or yours, and whether they clip or nail. If the answer to that last one is nail, keep looking.
Taking them down so next year takes an hour
Take the lights down on a dry day in early January, and leave the clips on the strand. This is the second half of the floor trick: next November, the strand comes out of the bin already clipped, and you’re back on the gutter in minutes.
I wrap each run around a piece of cardboard cut from a shipping box, with a strip of painter’s tape labeled “front gutter 38 ft” or “porch rail.” Each strand goes in the bin flat. My first year I balled everything into a trash bag, and untangling it took longer than hanging it.
Before the lights go up next fall, it’s worth walking the house with the rest of the cold-weather list. I keep mine in the winterize house checklist, and I do the gutters and the outdoor faucets the same weekend the lights go up, since the ladder is already out.
What hanging Christmas lights outside cost me, DIY vs hired
These are my numbers for 38 feet of front gutter, 22 feet of porch rail and four shrubs, compared against the two quotes I got for the same house.
| Item | My DIY cost (year one) | My DIY cost (year two on) | Hired, my lights | Hired, full package |
|---|---|---|---|---|
| LED C9 strands, about 70 ft total | $96 | $0 | $0 (mine) | Included |
| All-in-one clips, 100-pack | $11 | $0 (stay on strand) | Usually included | Included |
| Net lights for 4 shrubs | $60 | $0 | Extra or not offered | Included |
| Outdoor cord, 25 ft, plus GFCI adapter | $40 | $0 | Often not included | Included |
| Outdoor timer | $14 | $0 | Sometimes included | Included |
| Labor, hang and take down | About 4 hours | About 2.5 hours | $425 quote | $1,150 quote |
| Season electricity, LED, 6 hrs a night | About $4 | About $4 | About $4 | About $4 |
| Total | About $225 | About $4 | About $430 + gear | About $1,150 a year |
Year two is the number that sold me. Once the strands and clips exist, DIY costs me electricity and a Saturday morning.
What blows the Christmas lights budget
- Buying before you measure. Short by one strand means a second store run at December prices, and the second strand rarely matches the first one’s color temperature. My mismatched warm and cool whites looked like two different houses.
- Cheap adhesive clips on siding. I paid $7 for a pack that fell off in a week, then $13 for the cold-rated ones that should have been the first purchase. Buy once.
- Tossing the clips at takedown. Pulling every clip off in January means buying and snapping on 64 new ones next November. Leave them on the strand and the bin does the work for you.
Grab my free Project Cost Estimator. Put your roofline measurements, strand lengths and clip count on one sheet before you hit the store, and you’ll see the real total while you can still put a box of net lights back. It’s the same one-page sheet I use for every weekend project around the house.
Frequently Asked Questions
How do you hang Christmas lights outside without nails?
Use plastic clips matched to the surface: gutter clips or all-in-one clips on the gutter lip, shingle tabs under the bottom row of shingles, and cold-rated adhesive clips on siding, brick or window trim. Put one clip about every 12 inches, or at every socket for large C9 bulbs. Everything comes off in January without a mark, which matters if you rent and still matters if you own, since nail holes in fascia let water in behind the trim.
When should you hang Christmas lights outside?
Hang them on a dry weekend in early to mid November, before the ground freezes and before the first hard cold makes adhesive clips unreliable. You don’t have to turn them on until after Thanksgiving. Hanging them early lets you work in daylight above 50 degrees instead of on an icy ladder in December, and stake lights still go into soft ground.
How many Christmas lights can you connect together?
Read the tag near the plug on each strand, because it lists the maximum number of sets you can connect end to end. For older incandescent strands, CPSC guidance is no more than three sets together. LED strands draw much less power and usually allow many more, but the tag is the limit, not a guess. Plug the first strand into a GFCI outlet with an outdoor-rated cord, and keep every connection off the ground.
Prices here are 2026 estimates from my own receipts and two local quotes, and they’ll vary by region, house height, roof pitch and the products you choose. Tessa is a hands-on renter and DIYer, not a licensed electrician or contractor. Follow the labels on your ladder and your light strands, use only outdoor-rated cords and GFCI-protected outlets, stay clear of overhead power lines, and hire a pro for any roofline you can’t reach safely from the ladder.
Free DIY Project Cost Estimator
The spreadsheet I use to price out a project before I start, so a weekend job never blows the budget. Join the newsletter and I’ll send it over.
No spam, ever. Unsubscribe anytime. — Tessa
Keep reading — more on Holiday & Seasonal DIY
Outdoor Pumpkin Decorations That Don't Rot in Two Weeks
I bought my outdoor pumpkin decorations on the last Saturday of September two years ago. Six…
Read article →
DIY Fall Wreath: Three Versions Under $25 (That Survive the Front Door)
My three DIY fall wreath builds, all under $25: the real receipts, which base survives rain…
Read article →
Fall Porch Decor on a Budget (The Weekend Version, No Pumpkin Overload)
The first weekend of September I hauled a bale of straw up my front steps, dropped…
Read article →
Last-Minute 4th of July Decor on a Budget (Easy DIY Ideas)
Last-minute 4th of July decor on a budget: a three-zone plan, dollar-store buys, and real costs…
Read article →