
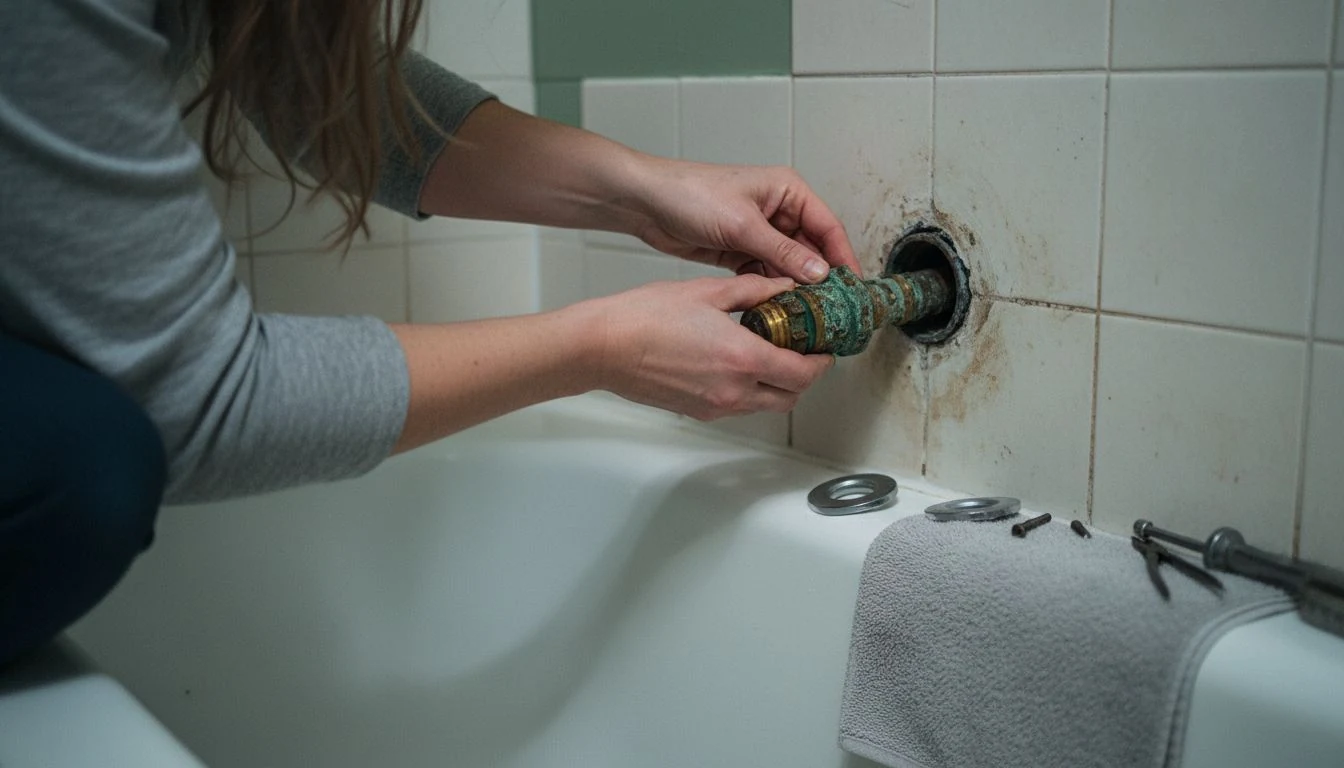
The drip started in March and I ignored it until the last week of April, because it was in the main bathroom and the main bathroom is where I put the things I do not want to think about. Then one night I was in bed and I could hear it through the wall. Not water hitting the tub. The pipe itself, ticking, every second and a half.
Here is the short version of how to fix a leaky bathtub faucet: shut the water off, pull the handle and the trim plate, and replace the cartridge or the stem washer sitting inside the valve behind your wall. Forty minutes and roughly $25 in parts when it goes well. The thing nobody tells you first is that a bathtub has no shutoff underneath it, so this job opens with turning off the water to your whole house.
That single difference is why people put this off for a month. I did.
If your leak is at a sink instead, I wrote the sink version separately, because the parts and the shutoff are different enough to matter: how to fix a leaky faucet covers the two-handle and single-handle fixtures on a vanity or in a kitchen. And if it is the spigot outside the house, that one has its own failure points and its own freeze risk, so go read how to fix a leaky outdoor faucet. This post is only about the valve in the wall of a tub or shower.
Jump to what you need:
- Which valve you have
- There is no shutoff under a bathtub
- The tools that make this a 40-minute job
- Step by step, handle to reassembly
- When the cartridge will not come out
- If the drip is at the spout or the showerhead
- When to stop and call a plumber
- What it costs you versus a plumber
- FAQ
How to fix a leaky bathtub faucet starts with the valve behind your wall
You are not buying a faucet. You are buying one small part that lives inside the valve, and there are three kinds.
Cartridge. One handle that swings left to right for temperature. Inside is a plastic or brass sleeve, and the whole repair is pulling the old one and pushing a new one in. Moen and Delta and Kohler all use their own, and they are not interchangeable.
Compression, or two-handle stem. Separate hot and cold handles, usually anything installed before the mid-1980s. Each handle has a stem with a rubber seat washer at the bottom, and that washer is almost always what failed. Parts cost under $10.
Ball. A single handle that lifts up and rotates. Delta’s classic. The repair kit is springs, rubber seats, and a cam, and it runs about $20.
Here is how I figured out which one I had without guessing: I took a photo of the handle and the trim plate, then searched the brand name stamped on the escutcheon along with “tub shower cartridge.” Mine said Moen on the trim ring in letters I had never once noticed in six years of living there. The cartridge was a 1225. Sixteen dollars.
If there is no brand marking anywhere, pull the handle off first and photograph what is behind it. Every parts counter and every plumbing forum can identify a valve from that photo in about a minute. Do not buy anything before you have that picture.
There is no shutoff under a bathtub, and that changes the job
A vanity faucet has two little angle stops under the cabinet. You turn those, you fix the faucet, nobody else in the house notices. A tub and shower valve is buried in a wall cavity with no stops in front of it, which means your options are these, in order of how much I like them.
- Integral service stops on the valve itself. Many Moen and Delta valves made in the last twenty-five years have two small screw slots inside the valve body, one for hot and one for cold, reachable once the trim plate is off. Turn them clockwise with a flat screwdriver and you have shut off that one fixture. Check for these before you do anything else. It is the difference between a 40-minute repair and a household announcement.
- An access panel. Look at the wall directly behind the valve, which usually means a bedroom closet, a hallway, or a linen cupboard. Older houses often have a removable panel there, and sometimes there are real shutoff valves inside it.
- The main. Basement or crawlspace where the line enters, or at the water meter. Then open the tub spout and a faucet on a lower floor to drain the pressure out of the lines before you take anything apart.
I did not know about the integral stops. I shut off the whole house on a Saturday morning, which is how I learned my daughter had been mid-shampoo. That was avoidable and it was my fault for not looking.
One more thing while the water is off. Put a rag in the tub drain. Every screw you drop in the next hour will find that drain with a precision that feels personal.
The tools that make this a 40-minute job instead of a Saturday
Most of this you have already. Two things you probably do not, and every guide on how to fix a leaky bathtub faucet that skips them is setting you up to fail at the last step.
- A cartridge puller for your brand, around $20. Moen’s is a threaded rod that grabs the stem and walks the cartridge out straight. Without it you are prying at a corroded brass sleeve with pliers, and that is how a $16 repair becomes a plumber’s invoice.
- A tub and shower stem socket set, around $15, if you have two handles. The bonnet nut holding each stem sits deep inside the wall and no normal socket reaches it.
- Needle-nose pliers, for the horseshoe-shaped retaining clip on cartridge valves. It looks like a piece of scrap wire. It is what holds the cartridge in.
- Allen keys, a Phillips screwdriver, penetrating oil, white vinegar, an old towel.
- Silicone plumber’s grease, about $6. Not petroleum jelly. Petroleum breaks down the O-rings you just paid for, and it will fail again in a year.
I bought the puller after forty minutes of failing without one. Amortized over a repair I have now done twice, it was the cheapest thing in the bathroom.
How to fix a leaky bathtub faucet, step by step
This is a single-handle cartridge valve, the most common setup in American houses built after about 1985. Two-handle stems are the same sequence with a socket wrench in the middle.
- Pop the handle cap. There is a plastic button or a decorative cap hiding a screw. A fingernail or a small flathead lifts it.
- Remove the handle screw and pull the handle straight off. If it will not move, it is mineral scale, not a hidden fastener. White vinegar on a rag around the base, fifteen minutes, then wiggle.
- Take off the trim plate. Either set screws or it threads off counterclockwise. Now look for those integral stops and shut them if you have them.
- Pull the retaining clip with needle-nose pliers and set it somewhere it cannot roll away. You need it again on reassembly, and it is small enough to vanish into a bathroom floor forever.
- Turn the cartridge a quarter turn before pulling. This breaks the corrosion seal and is the step everyone skips. Then thread the puller on and pull it straight out, no rocking.
- Take the old cartridge to the store with you. Not the photo. The part. Same brand, same model, hot and cold orientation matched.
- Grease the new O-rings with silicone, seat the cartridge in the same orientation the old one came out in, replace the clip.
- Turn the water back on slowly. A quarter turn, wait, then more. Opening a main all at once sends a pressure spike through a system you just opened.
- Watch the valve for five full minutes with a flashlight before you put the trim plate back. Both handle positions, hot and cold. A drip behind the plate is a drip inside your wall.
Mine dripped again the first time. I had the cartridge in 180 degrees off, which reverses hot and cold and, in my case, held the seal slightly open. Pulled it, flipped it, done. Five minutes.
How to fix a leaky bathtub faucet when the cartridge is seized
Twenty-year-old brass in hard water fuses to twenty-year-old brass. It happens and it is not a sign you did anything wrong.
Work in this order. Penetrating oil around the cartridge, half an hour of waiting, then the quarter turn again. Still stuck, put steady pressure on the puller and tap the wrench handle lightly instead of hauling on it, because vibration breaks corrosion better than force. Still stuck, soak the cavity with white vinegar for an hour to dissolve the scale.
Then stop. If the cartridge is coming out in pieces, or the valve body itself turns when you pull, put the trim plate back on, turn your water on, and call somebody. A valve body that rotates inside the wall means the pipe connections behind it are moving, and the next thing that happens is a leak you cannot see and cannot reach.
There is no shame in making that call. It is the $200 that stops the $4,000 one.
If the drip is at the tub spout or the showerhead instead
Check these before you take anything apart, because two of them are not valve problems and one is not a problem at all.
A showerhead that dribbles for a minute or two after you shut the water off is the vertical riser draining itself. Leave it alone. If water runs out of the tub spout the whole time the shower is going, that is the diverter inside the spout wearing out, and you replace the spout instead of the valve. Slip-fit spouts have a set screw underneath and come off in two minutes, threaded ones unscrew, and either way you are looking at $20 to $50 and none of the work above.
Water seeping where the spout or the trim plate meets the tile is failed caulk, and it matters more than it looks. That water runs down the inside of the wall until the ceiling below it stains. Use silicone, not latex.
A steady drip from the spout with both handles off is your valve. That one sends you back up to the cartridge.
When to stop and call a plumber
I fix a lot of things. Knowing how to fix a leaky bathtub faucet also means knowing the four cases where I hand it over, and none of them make you less capable.
The wall around the valve is soft, stained, or smells like a basement. Then the leak has been going into the cavity, not down the drain, and the repair is now drywall and possibly framing. The EPA’s guidance on mold cleanup in the home puts the do-it-yourself line at about ten square feet, roughly a three-by-three patch, and says to fix plumbing leaks as soon as possible and dry everything completely. Past that patch size, you want somebody who does remediation. My breakdown of what drywall repair costs covers the wall side of it if you are pricing the whole job.
The valve body itself has to be replaced. This means opening the wall and soldering or crimping new connections, and on an old two-handle setup you are also moving to a pressure-balancing valve, which is what current code wants so the shower does not scald somebody when a toilet flushes. Budget $350 to $900 with labor, plus tile or drywall repair on top. If you are staring at that number and thinking about replacing the whole tub anyway, my tub to shower conversion cost guide has what that path actually runs.
You have galvanized pipe, or copper with green crust at the joints. Those want a professional’s hands, not yours.
And when you do hire, get the price in writing before anyone starts, including the trip charge. The FTC’s advice on avoiding home improvement scams is worth two minutes if somebody starts talking about a whole-bathroom repipe over a drip. I keep a longer checklist for reading estimates in how to tell if a contractor quote is fair.
What it costs to fix a leaky bathtub faucet yourself vs. a plumber
These are the numbers from my own two repairs plus the three quotes I collected before I decided to try it, corrected to 2026 pricing. What it costs to fix a leaky bathtub faucet comes down to which of these seven rows you are in.
| What is wrong | Part cost (DIY) | Your time | Plumber, installed (2026 est.) |
|---|---|---|---|
| Cartridge valve, single handle | $15 to $40 | 40 to 90 min | $175 to $400 |
| Two-handle stem and seat washers | $8 to $25 | 1 to 2 hours | $175 to $375 |
| Ball valve repair kit | $15 to $30 | 45 to 90 min | $175 to $400 |
| Tub spout with worn diverter | $20 to $50 | 10 to 30 min | $150 to $300 |
| Re-caulk the escutcheon and spout | $8 | 20 min plus cure | $125 to $250 |
| Full valve body replacement | Not a DIY job | n/a | $350 to $900 plus wall repair |
| Seized cartridge, valve turning in wall | Stop here | n/a | $400 to $1,200 |
The reason a $16 part turns into a $300 invoice is almost entirely the minimum service call. Very few plumbers bill twenty minutes of work as twenty minutes of work, and I do not blame them for that.
Waiting is not free either. A faucet dripping once per second wastes more than 3,000 gallons a year, according to EPA WaterSense, and the average household loses over 9,300 gallons annually to leaks it has not found. My tub was hot-side, so I was also paying to heat every one of those drips.
Where people go wrong on this repair
- Buying the part before pulling the old one. “Moen tub cartridge” is not one part, it is a dozen, and the ones that look identical on a shelf differ in stem length. Take the old cartridge to the counter. I made two trips the first time and one of them was forty minutes each way.
- Prying instead of pulling. Vise grips on a corroded cartridge crack the plastic and leave the sleeve seized in the valve body, which converts a part swap into a valve replacement and a wall opening. The $20 puller is not optional equipment, it is the whole job.
- Closing the wall up before watching it under pressure. Put the trim plate on after five minutes of flashlight time at full pressure in both handle positions, not before. A slow weep behind an escutcheon is invisible for months and then it is your subfloor.
Grab my free Project Cost Estimator. Before you call anybody about a drip, put the part number, the minimum service call in your area, and your own hourly patience into the sheet. It is what showed me that the plumber quoting $285 and the $16 cartridge were solving the identical problem.
Frequently Asked Questions
How do I fix a leaky bathtub faucet without turning off the water to my whole house?
Check for integral service stops first. With the trim plate removed, most Moen and Delta valves from the last twenty-five years have two small screwdriver slots inside the valve body that shut off hot and cold for that fixture alone. Failing that, look for an access panel in the wall behind the valve, often in a closet or hallway. If neither exists, the main is your only option, and you should warn the house before you touch it.
Why does my bathtub faucet still drip after I replaced the cartridge?
Three usual causes. The cartridge went in rotated, which reverses hot and cold and can hold the seal slightly open, so pull it and flip it 180 degrees. Or it is the wrong cartridge, close enough to seat but not to seal. Or the valve seats inside the body are pitted from years of grit, in which case a new cartridge cannot seal against them and the valve body needs replacing.
Can a dripping bathtub faucet raise my water bill much?
One drip per second is over 3,000 gallons a year per EPA WaterSense, and household leaks average more than 9,300 gallons annually. On most municipal rates that is a modest line item on its own. The real cost shows up when the drip is on the hot side, since you are paying to heat water that goes straight down the drain, or when the leak is inside the wall instead of into the tub.
How long does this repair take a first-timer?
Budget two hours for the first one and forty minutes for every one after. Most of the first attempt is identifying the valve, finding the shutoff, and driving to the store. The actual mechanical work is fifteen minutes. Add an hour if the cartridge is seized and you are working through penetrating oil and vinegar soaks.
Should I replace the whole valve while I am in there?
Only if the cartridge fix has already failed or the seats are visibly pitted, because replacing the valve body means opening the wall, soldering or crimping, and repairing tile. That is a $350 to $900 job with labor before wall repair, against $16 for a cartridge. Fix the cheap thing first and see if it holds. Mine has held for two years.
All prices here are 2026 estimates and vary by region, valve brand and age, wall and pipe access, plumbing material, and local labor rates and minimum service charges. Tessa is a hands-on homeowner, not a licensed plumber; use these ranges and steps to ask sharper questions, and confirm code requirements and anything involving pipe joints, scald protection, or wall openings with a licensed pro in your area.
Free DIY Project Cost Estimator
The spreadsheet I use to price out a project before I start, so a weekend job never blows the budget. Join the newsletter and I’ll send it over.
No spam, ever. Unsubscribe anytime. — Tessa
Keep reading — more on Easy DIY & Repairs
Mini Split Maintenance: The DIY Checklist and What a Pro Charges
The smell showed up first. Our mini split lives in the room over the garage, the…
Read article →
How to Patch a Drywall Hole (The Three Sizes, and the One You Should Not DIY)
The doorknob went through the hallway wall on a Tuesday, and I want to be honest…
Read article →
How to Fix a Dripping Kitchen Faucet (Cartridge, O-Rings, and the Sprayer Hose Nobody Checks)
My kitchen faucet dripped for a summer. I told myself it was the aerator, because the…
Read article →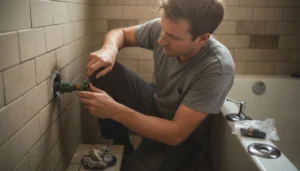
How to Fix a Leaking Shower Faucet: Cartridge, Two Handles, and No Shutoff
The guest shower dripped for eleven months before I did anything about it. Not a fast…
Read article →