
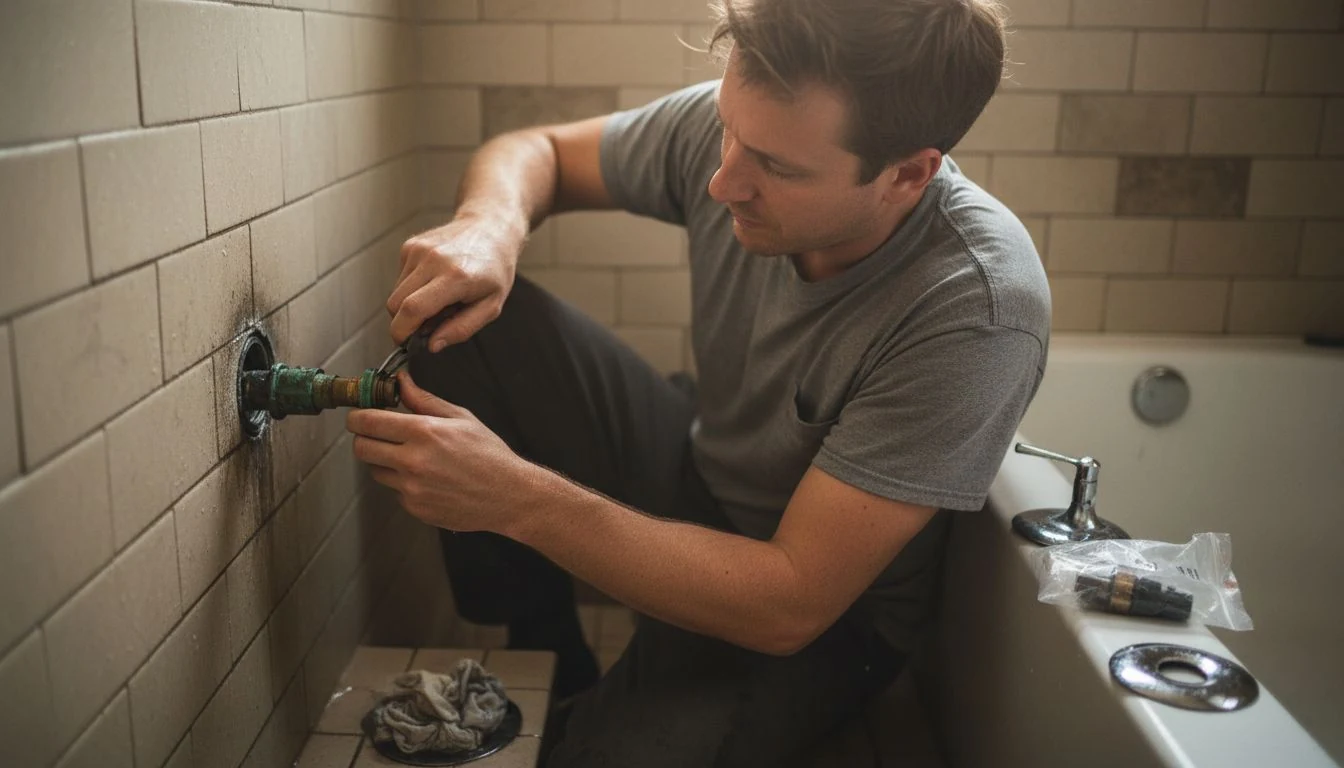
The guest shower dripped for eleven months before I did anything about it. Not a fast drip. One bead every four or five seconds, loud enough to hear from the hallway at night, quiet enough to ignore in daylight. I finally fixed it on a Tuesday morning in about ninety minutes, and the part cost $24.
Nobody warns you about the part that actually eats the morning. When you go looking for how to fix a leaking shower faucet, the repair itself is rarely the hard bit. Working out which valve is buried in your wall is. So is shutting the water off when there is no little chrome knob under a sink to save you.
This post is about the valve behind the tile. If your drip comes out of the tub spout below the shower, or you have a tub and shower combo where the water will not fully divert upward, that is a different diagnosis and I walked through it in my guide to how to fix a leaky bathtub faucet. Come back here when the drip is at the showerhead itself.
Jump to what you need:
- Which valve is in your wall
- Shutting the water off with no shutoff valve
- Tools and parts to have ready
- Single handle, step by step
- Two handles, and why it is a different part
- When the cartridge will not come out
- When it is the diverter, not the valve
- When to stop and call a plumber
- What it costs, DIY vs. plumber
- FAQ
Before you fix a leaking shower faucet, find out which valve is in your wall
Everything downstream depends on this. Get it wrong and you make two trips to the hardware store, which is exactly what I did.
Count your handles first. One handle that swings side to side for temperature and out for volume is a cartridge valve, and it is what most American showers built after about 1985 have. Two handles, hot on one side and cold on the other, is usually a compression valve with rubber seat washers, or on some mid-century houses a pair of stems that work the same way. A single handle that rotates in a full circle without a stop is often an old ball valve, mostly Delta, and it takes a repair kit rather than a cartridge.
Then find the brand. Pop the colored button off the center of the handle with a flathead, or look along the edge of the trim plate. Moen, Delta, Kohler, Price Pfister and American Standard all stamp their logo somewhere. This matters more than the valve type, because a Moen 1225 cartridge and a Delta RP19804 kit are not interchangeable and no store employee can guess for you. My guest shower turned out to be a Moen Posi-Temp from 1998. I assumed Delta, because the downstairs one is, and bought the wrong thing. Photograph the trim and the old part before you go.
One more read before you touch anything. Does the drip happen only right after you shower, or all day? Water dribbling for two or three minutes after you shut off is just the riser pipe draining, and that is normal. A drip still going an hour later is your valve.
How do you fix a leaking shower faucet when there is no shutoff valve?
This is the question that stops most people, and the honest answer is that you have three options and you should check them in this order.
Integral service stops. Pull the trim plate off and shine a light into the valve body. Most Moen and Delta valves from the last twenty-five years have two small slotted screws at roughly four and eight o’clock inside the brass body. Those are stops. Turn them clockwise with a flathead until they seat and you have killed hot and cold to that fixture alone, with the rest of the house still running. I did not know these existed for years.
An access panel. Walk to the wall directly behind the shower valve. In a lot of houses that is a hallway closet, a linen cupboard or a bedroom wall, and there is a removable panel about a foot square screwed over the plumbing. Behind it you may find dedicated shutoffs.
The main. If neither exists, you shut off the whole house at the main valve, usually where the supply line enters near the water heater, in a basement, or in a garage. Tell the people in your house before you do this. Then open the lowest faucet in the house to drain the pressure out of the lines, and open the shower valve itself so nothing is sitting behind the cartridge when you pull it.
A tip that saved me a genuine disaster: before you loosen a single thing, stuff a rag or a wad of paper towel into the shower drain. Escutcheon screws and retaining clips are tiny, they are brass, and they bounce. I lost the retaining clip on my first attempt and spent twenty minutes with a magnet on a stick before I gave up and bought a new one.
The tools and parts worth having ready
You can do this repair with a flathead, a Phillips and a pair of needle-nose pliers. You will enjoy it a lot more with the rest of this list.
- The correct cartridge or repair kit. $15 to $45 depending on brand. Buy the manufacturer part, not the universal one. I have never once had a universal cartridge seal properly on the first try.
- Allen key set. Most single handles are held on by a tiny set screw underneath, not a Phillips screw in the middle.
- Needle-nose pliers for the horseshoe-shaped retaining clip.
- Cartridge puller for your brand, around $25 to $45. Buy it only if the cartridge refuses to move.
- Plumber’s silicone grease. Two dollars, and it decides whether the new cartridge turns smoothly for a decade or binds in two years. Petroleum jelly degrades the rubber, so it is not a substitute.
- White vinegar and an old toothbrush for the mineral crust inside the valve body.
Under $30 all in, for a job no plumber will do for less than their minimum service call.
How to fix a leaking shower faucet, step by step
This is the single-handle cartridge version, which covers the majority of showers. Budget two hours for your first one. Forty minutes for every one after that.
- Shut the water off using whichever of the three methods above applies, then open the shower handle fully to bleed the line. Wait for it to stop entirely. Close the handle again.
- Plug the drain. Rag, towel, drain cover, anything.
- Pull the handle. Pry off the decorative cap, back out the set screw or the long handle screw, and work the handle straight off. If it is stuck from mineral buildup, wrap it in a hot wet cloth for five minutes and try again rather than levering on it.
- Remove the trim plate. Two screws usually. Score the caulk line around it with a utility knife first so you do not tear the tile face.
- Note the orientation. Take a photo. Cartridges go in one way and a flipped one reverses hot and cold, which is the most common reason a repair “fails.”
- Pull the retaining clip with needle-nose pliers. It is a small U or horseshoe on top of the valve body. Put it somewhere it cannot roll.
- Pull the cartridge straight out. Grip the stem with pliers and twist a quarter turn each way to break it loose, then pull. It should slide with firm hand pressure. If it will not, go to the next section and do not force it.
- Clean the valve body. Vinegar on the toothbrush, then wipe. Look at the seats inside for pitting or grit while you are in there.
- Grease and seat the new cartridge. Thin film of silicone grease on the o-rings, push it in with the same orientation as the old one, reinstall the clip.
- Test before you close it up. Water back on, run hot and cold at full pressure, and stand there with a flashlight for five full minutes watching the valve body. Then reinstall trim, handle, and fresh caulk along the top and sides of the plate, leaving the bottom edge open so any water behind it can escape.
Then reset the temperature limit stop, which is the part I got wrong. Most cartridge valves have a plastic collar that caps how far toward hot the handle can go. Mine went back on rotated, and the first shower afterward came out hot enough that I jumped out of it. The CPSC recommends setting household water to 120 degrees Fahrenheit, and points out that 150 degree water causes third-degree burns in about two seconds. Set the stop, then test the temperature at the showerhead before anyone else uses it.
Two handles change the job and the part you need
Separate hot and cold handles almost always means compression stems, and the leak is a worn rubber seat washer at the bottom of one of them. Those parts cost about $8, not $40. Shut off the hot supply alone first and see whether the drip stops, because if it does you only have to rebuild one side.
The sequence is similar, except that instead of a retaining clip you unthread the entire stem out of the wall with a deep socket, sold as a shower valve socket wrench for about $12 a set. Under the stem is a brass screw holding a rubber washer. Replace the washer. Then, while it is apart, run a seat wrench into the valve body and feel the brass seat the washer presses against. Rough means back it out and fit a new one, because a fresh washer against a chewed-up seat starts dripping again inside a month.
That last step is the one most tutorials skip, and it is why people will tell you rebuilding an old two-handle valve “does not work.”
When the cartridge will not come out
Two decades of minerals can weld a cartridge into a valve body. Here is the escalation ladder, and please go in order.
First, soak it. Pour white vinegar into the valve body with a turkey baster, give it forty-five minutes, try again. Second, get the puller for your brand, which threads onto the cartridge stem and draws it out straight with a screw instead of brute force. Third, stop. If the entire brass valve body starts rotating inside the wall when you pull, the pipe connections behind it are moving, and pushing on means breaking a solder joint inside a closed wall. That is no longer a $24 repair.
My mistake here was the downstairs shower, not the guest one. I grabbed the plastic cartridge stem with channel locks and cranked. It snapped off flush with the valve body, leaving nothing to grip, and turned a straightforward morning into a puller purchase and a second trip. Twist gently, pull straight, buy the $30 tool the moment it resists.
When the leak is the diverter and not the valve
Worth ruling out before you buy any part, because the fix is often much simpler.
If water trickles from the showerhead while the tub spout is running, or the shower loses pressure and some water keeps falling out of the spout, your diverter is worn, not your mixing valve. On a tub and shower combo that pull-up knob on the spout is the whole mechanism, and replacing the spout is a ten minute job that costs $20 to $50. On a three-handle setup the center handle is a separate diverter valve with its own stem and washer.
And if the drip is coming from the showerhead only when the shower has just been used, look at the head itself. A worn washer inside the head or crusted mineral buildup will do it, and the EPA notes that a showerhead leaking at ten drips per minute wastes more than 500 gallons a year. Unscrew it, soak it overnight in vinegar, replace the rubber washer inside the collar, and wrap the threads with three turns of plumber’s tape.
When to stop and call a plumber
I am firmly in the “try it yourself” camp on faucets, including this one. Four situations where I would not: the valve body spins in the wall, as covered above; there is water staining the ceiling below the bathroom or the wall outside the shower, which means the leak is behind the tile and is no longer about a cartridge; the pipes are galvanized steel and visibly corroded at the connections, since disturbing those often means replacing a run; or there is no shutoff and no access panel and you are not comfortable killing water to the whole house. That last one is a completely reasonable place to draw the line.
If the valve body itself has to be replaced and you were already thinking about redoing the space, price both at once, because the labor overlaps and I broke that math down in my tub to shower conversion cost guide.
Everything else, in my experience, is a Saturday morning and a cheap part. Same as the sink faucet repair and the outdoor spigot: identify the valve, kill the water, replace the wear part.
What it costs to fix a leaking shower faucet yourself vs. a plumber
These are 2026 estimates and they move a lot with your metro, because most of what you pay a plumber is the minimum service call, not the labor minutes.
| What is wrong | Parts (DIY) | Your time | Plumber, installed (2026 est.) |
|---|---|---|---|
| Single-handle cartridge | $15 to $45 | 45 to 120 min | $175 to $425 |
| Two-handle stems and washers | $8 to $30 | 1 to 2 hours | $185 to $400 |
| Ball valve repair kit | $15 to $35 | 45 to 90 min | $175 to $400 |
| Worn diverter on tub spout | $20 to $50 | 10 to 30 min | $150 to $300 |
| Showerhead washer, descale | $5 | 15 min plus soak | $125 to $250 |
| Cutting an access panel | $25 | Half a day | $150 to $450 |
| Full valve body replacement | Not a DIY job | n/a | $400 to $1,100 plus tile repair |
| Valve spinning in the wall | Stop here | n/a | $450 to $1,300 |
Two numbers make the case better than I can. My guest shower repair was $24 in parts against a $310 quote for the identical work. And per the EPA, fixing the easy household leaks trims about ten percent off a water bill, while the average home wastes more than 9,300 gallons a year to drips it has stopped noticing.
Where people go wrong on this repair
- Buying a universal cartridge instead of the brand part. It will physically fit and it will seal for a few months. Then you are doing the whole job again. Photograph the old cartridge and match the manufacturer number.
- Skipping the temperature limit stop on reassembly. A cartridge can go back in perfectly and still deliver scalding water because the plastic collar that caps the hot side was reinstalled rotated. Check it and test the temperature before anyone showers.
- Closing the wall up before a pressure test. Five minutes with a flashlight at full pressure, both handle positions, before the trim plate goes on. A slow weep behind an escutcheon hides for months and then it is your subfloor.
Grab my free Project Cost Estimator. Before you call anyone about a drip, put the part number, your area’s minimum service call, and an honest hour count into the sheet. That is the comparison that showed me the plumber quoting $310 and the $24 cartridge were solving the exact same problem.
Frequently Asked Questions
How do you fix a leaking shower faucet without turning off the water to the whole house?
Look for integral service stops first. With the trim plate removed, most Moen and Delta valves from the last twenty-five years have two small slotted screws inside the brass valve body that shut off hot and cold to that fixture alone. If yours does not have them, check the wall directly behind the shower for an access panel, which often hides in a closet or hallway. The main is the last resort, not the first move.
Why does my shower still drip after I replaced the cartridge?
Usually one of three things. The cartridge went in rotated, so pull it and turn it 180 degrees. Or it is the wrong cartridge, close enough to seat but not to seal, which is what happens with universal parts. Or the brass seats inside the valve body are pitted from years of grit, and no new cartridge can seal against a chewed-up seat. In that last case the valve body itself needs replacing.
Can I fix a leaking shower faucet if there is no access panel behind it?
Yes, in most cases, because the repair happens entirely from the front through the trim opening. You only need rear access if the valve body itself has to come out or the connections behind it need work. If you do end up cutting a panel, cut it in the back wall of a closet rather than a bedroom, and install a proper plastic access cover so the next repair is easy.
Is a dripping shower worth fixing right away?
Yes, and mostly not for the water bill. A drip at the showerhead is small on its own, but the same worn part that lets water past the seal is often letting a little water weep into the wall cavity behind the valve, where you cannot see it. Mine had been dripping for eleven months and the escutcheon caulk was already stained. Ninety minutes and $24 is cheap against opening a tile wall.
All prices here are 2026 estimates and vary by region, valve brand and age, wall and pipe access, plumbing material, and local labor rates and minimum service charges. Tessa is a hands-on homeowner, not a licensed plumber; use these ranges and steps to ask sharper questions, and confirm code requirements and anything involving pipe joints, scald protection, or wall openings with a licensed pro in your area.
Free DIY Project Cost Estimator
The spreadsheet I use to price out a project before I start, so a weekend job never blows the budget. Join the newsletter and I’ll send it over.
No spam, ever. Unsubscribe anytime. — Tessa
Keep reading — more on Easy DIY & Repairs
Water Heater Flush: How to Do It Yourself (and What a Plumber Charges)
The first winter in this house, the water heater in my basement started making a noise…
Read article →
Mini Split Maintenance: The DIY Checklist and What a Pro Charges
The smell showed up first. Our mini split lives in the room over the garage, the…
Read article →
How to Patch a Drywall Hole (The Three Sizes, and the One You Should Not DIY)
The doorknob went through the hallway wall on a Tuesday, and I want to be honest…
Read article →
How to Fix a Dripping Kitchen Faucet (Cartridge, O-Rings, and the Sprayer Hose Nobody Checks)
My kitchen faucet dripped for a summer. I told myself it was the aerator, because the…
Read article →